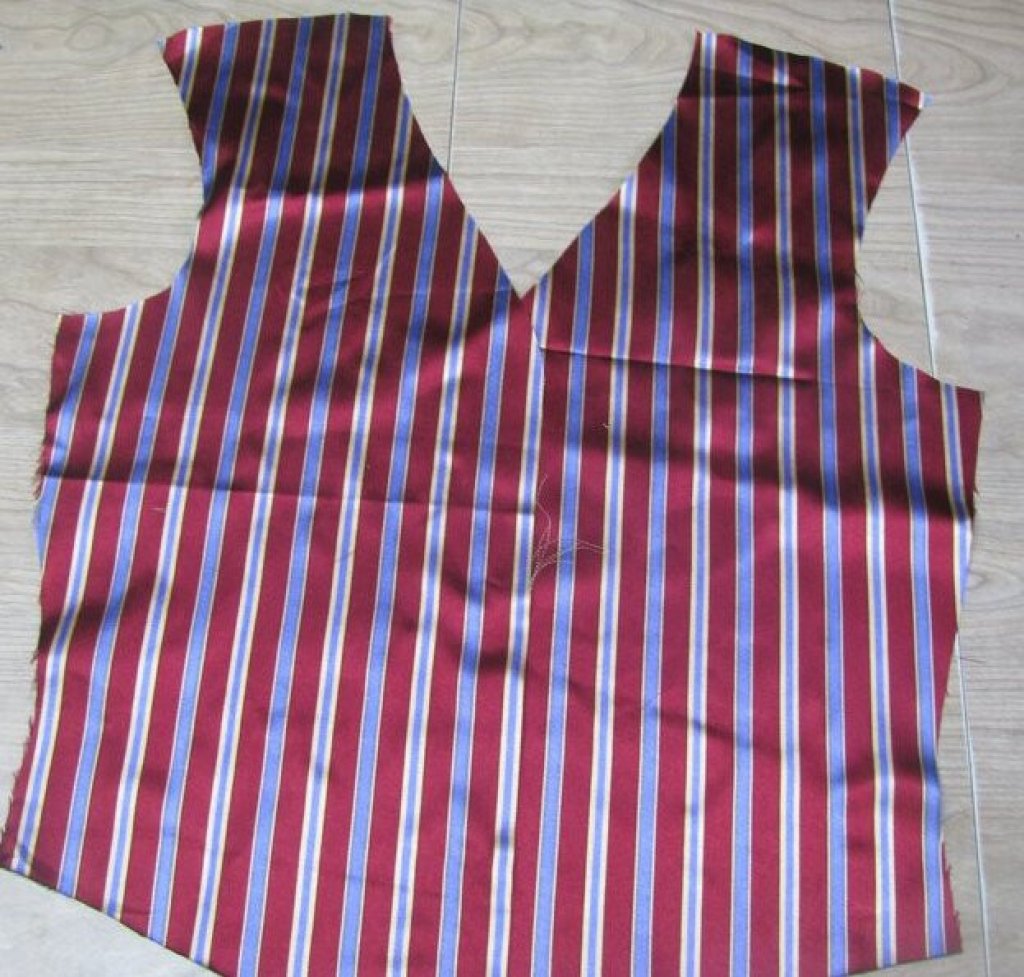
Today I worked on cutting out a silk waistcoat, drafted from Devere, 1866. I obtained the silk brocade from Needle and Thread in Pennsylvania a few years ago, and plan to wear this with my linen frock coat for summer. To start off, I drafted the proportionate waistcoat pattern with my personal measurements.
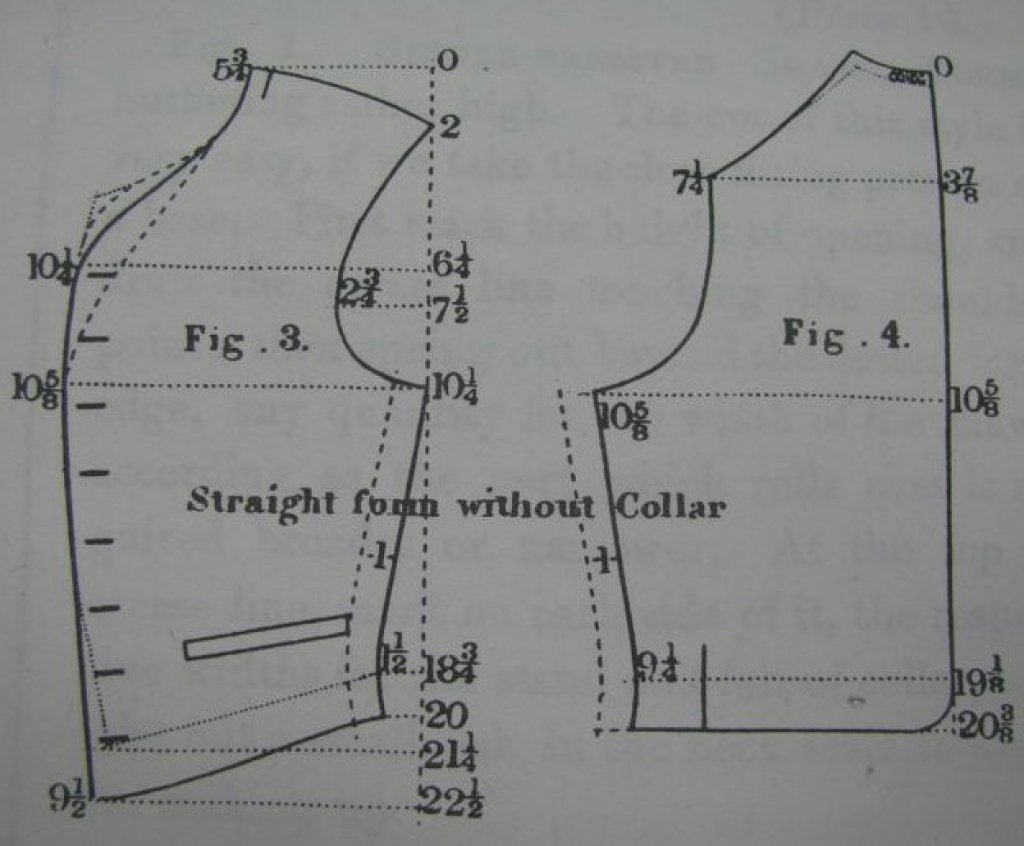
A Collarless Waistcoat
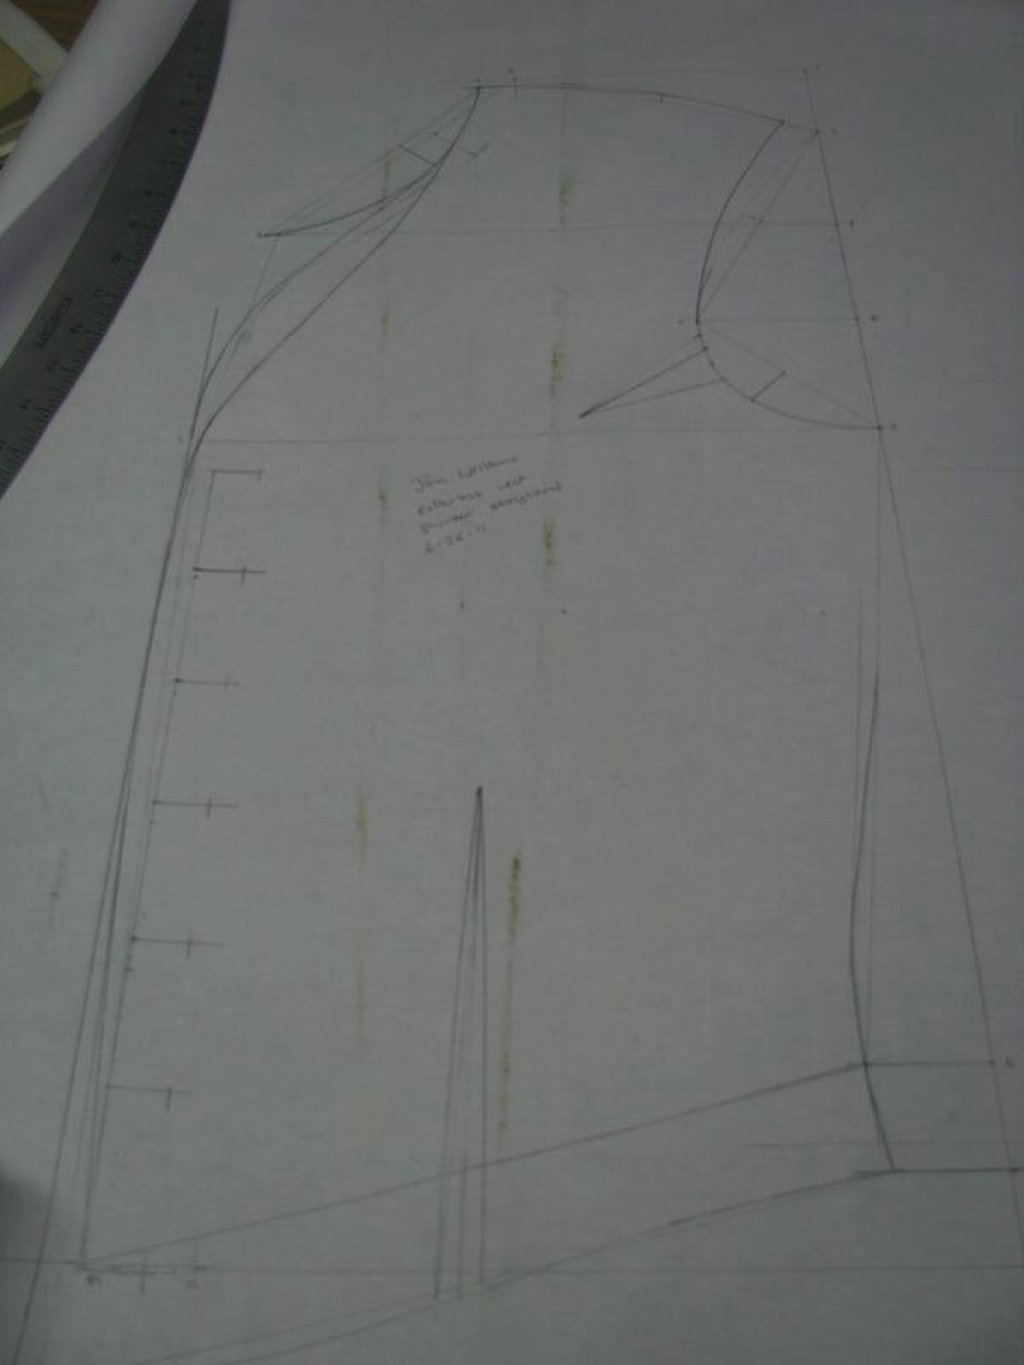
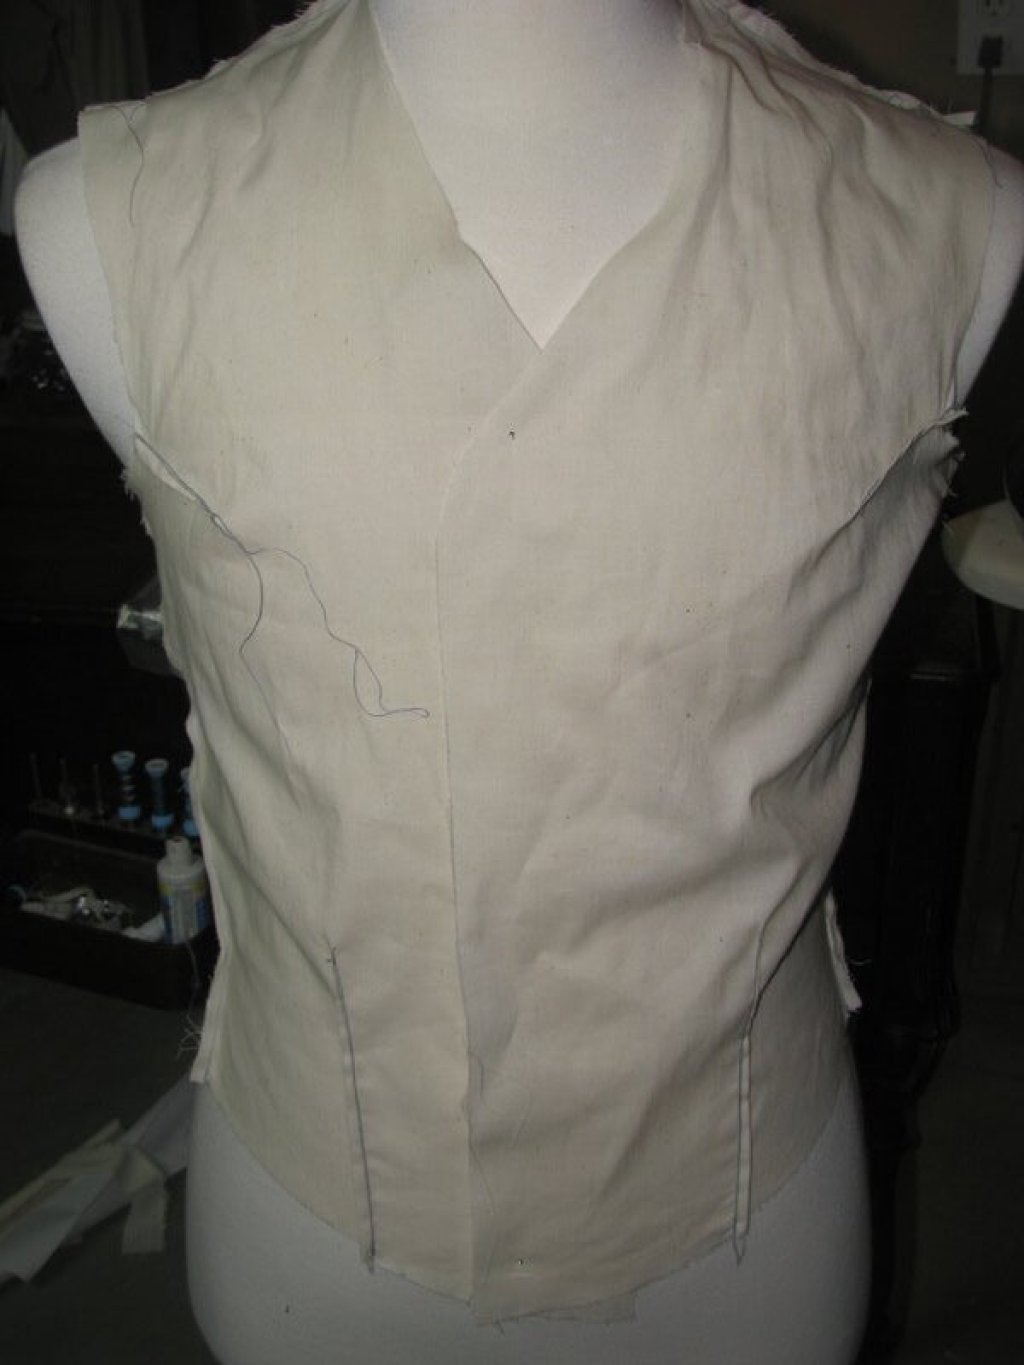
Next, it was a matter of stylizing the vest according to what I wanted. In this case, I’m going to make a collarless vest. You can see the proportionate pattern indicated by the thin dotted line. First, the back neck is raised up 3/8″ to take the place of the collar.
In the front, the neckline is adjusted according to your preference. In my case, I wanted a fairly high neckline.
In the front shoulder, a small gusset is inserted, to match the longer length we created in the back shoulder seam when it was raised.
Finally, the bottom of the waistcoat is lowered about 1 1/4″, according to fashion. In the 1860s, vests were worn a little below the natural waistline, to ensure they covered the tops of the trousers.
Fishes or Darts
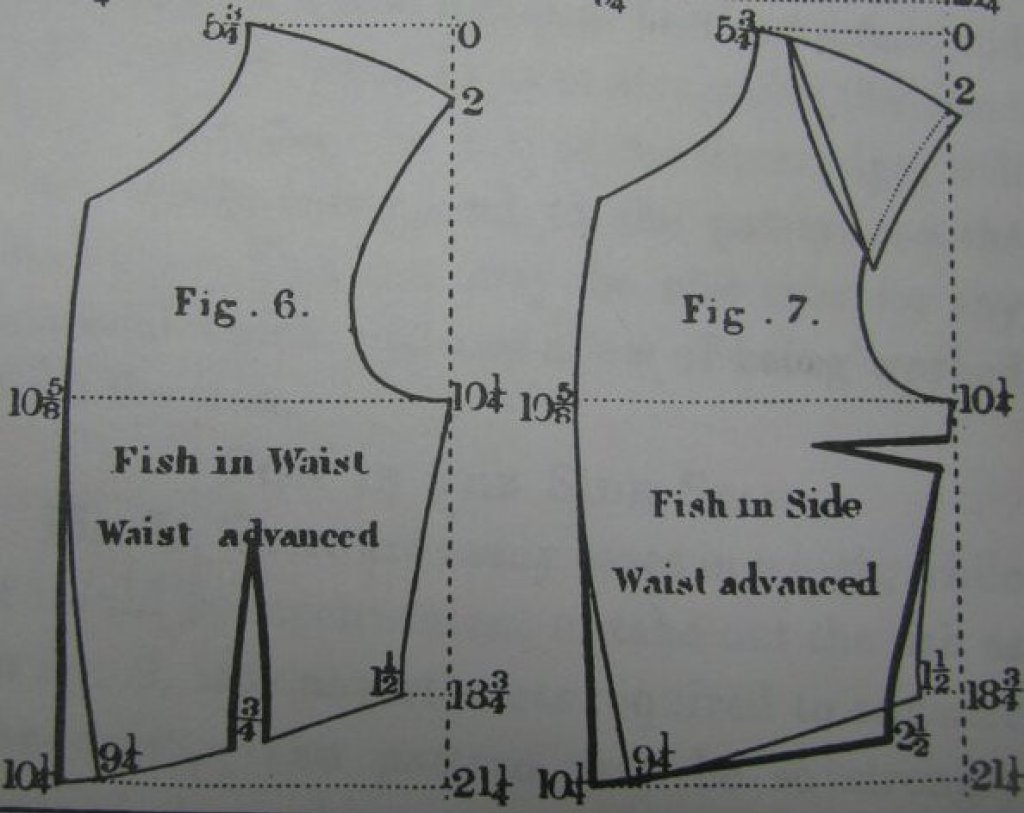
There were some special considerations I had to take, due to the type of fabric. Silk does not retain its shape when stretched, so darts (or fishes in Devere’s), were taken out to shape the fabric.
The first fish I took out was in the waist seam. This is done by extending the center front until it forms a straight line. Take that amount, and apply it to the fish. The fabric I’m using has large stripes, so by straightening the front, it allows the stripes to follow the edge of the waistcoat.
It’s also permissible to take the dart out on the side. In my case, this would have helped disguise the dart, allowing the front pattern to flow uninterrupted. However, it’s proximity was too close to the next dart that I put in, I felt.
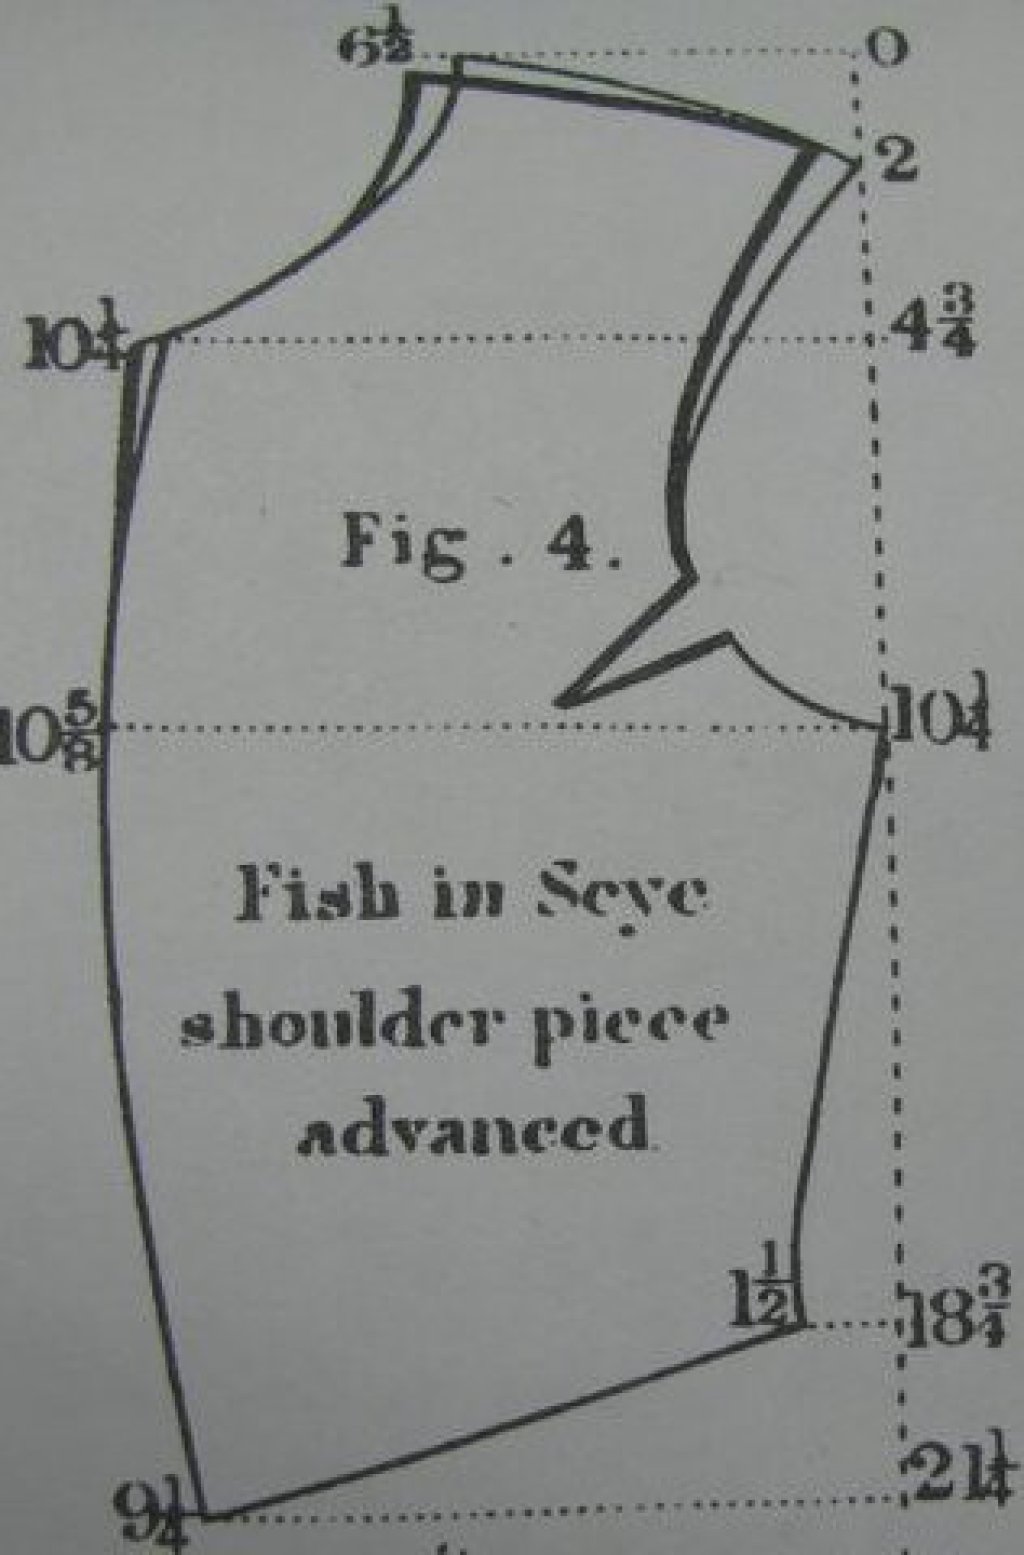
In the 1800s, coats were cut much more crooked than they are today. Without going into too much detail, you can see in this photo, the dark line represents the straighter cut, while the thinner line represents the crooked cut. With the crooked shoulder, properly worked up with an iron, you can get a much closer fit. However, working with silk, this is not possible.
The first step was to straighten the center front slightly, again forming the straight line. Next, the neckpoint was moved 5/8″, and lowered 1/4″. And the top of the scye was moved 5/8″ as well. This obviously displaces everything to a more straighter cut. But to get the closer fit, and counter all of this, we need to insert a dart in the armscye. This should be equal to the amount you straightened the shoulder.