The Jetted or Jeated Pocket is one of the most common pocket types, and forms the basis for many other pocket styles used in coats, waistcoats, and trousers. With this importance in mind, we’ll start with this pocket style in this tutorial series, and build upon your skills in future variations. For now, we will practice making the jettings only, without worrying about the pocket bag and other details. I highly recommend making at least ten pockets for practice, out of a variety of fabrics and weights: wool, silk, linen, cotten, using whichever scraps you may have leftover from other projects. This experience will benefit you greatly in the future.
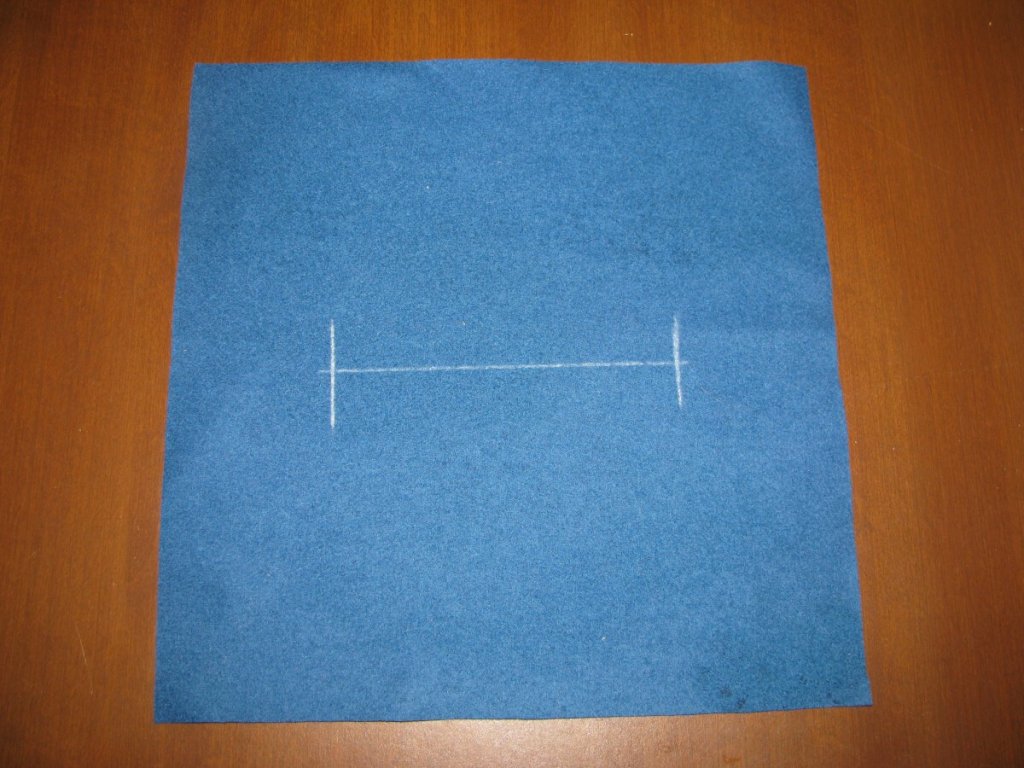
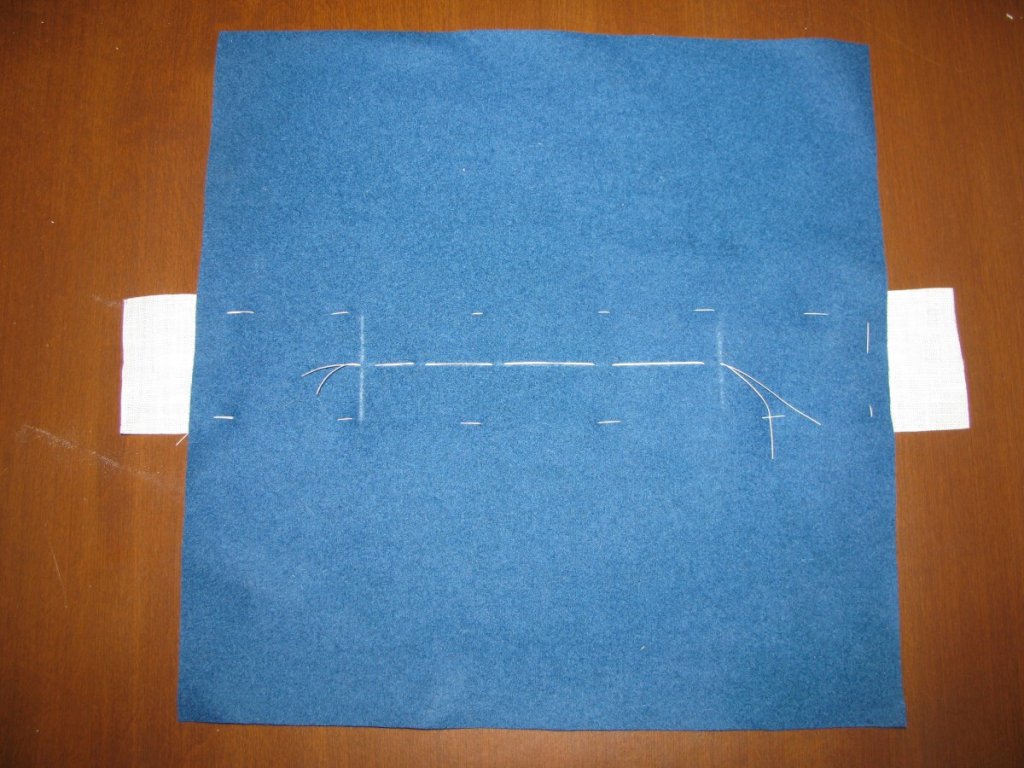
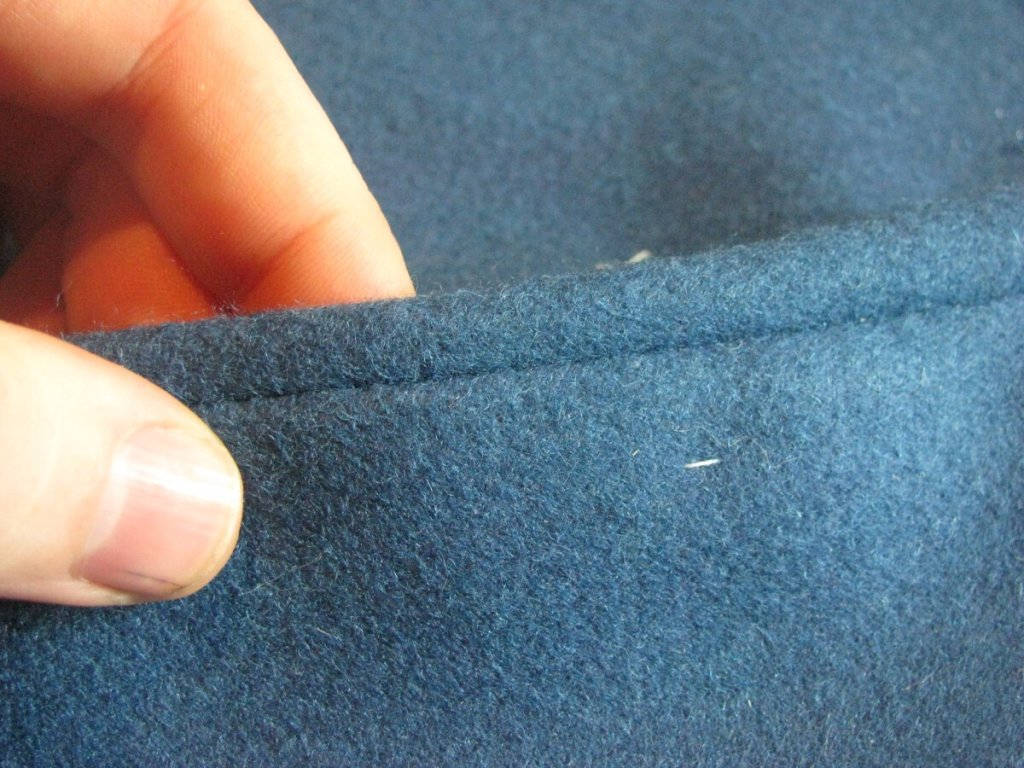
I’m starting with a 10 by 10 inch square of wool fabric, and will create a 5 inch wide jetted pocket in the center.
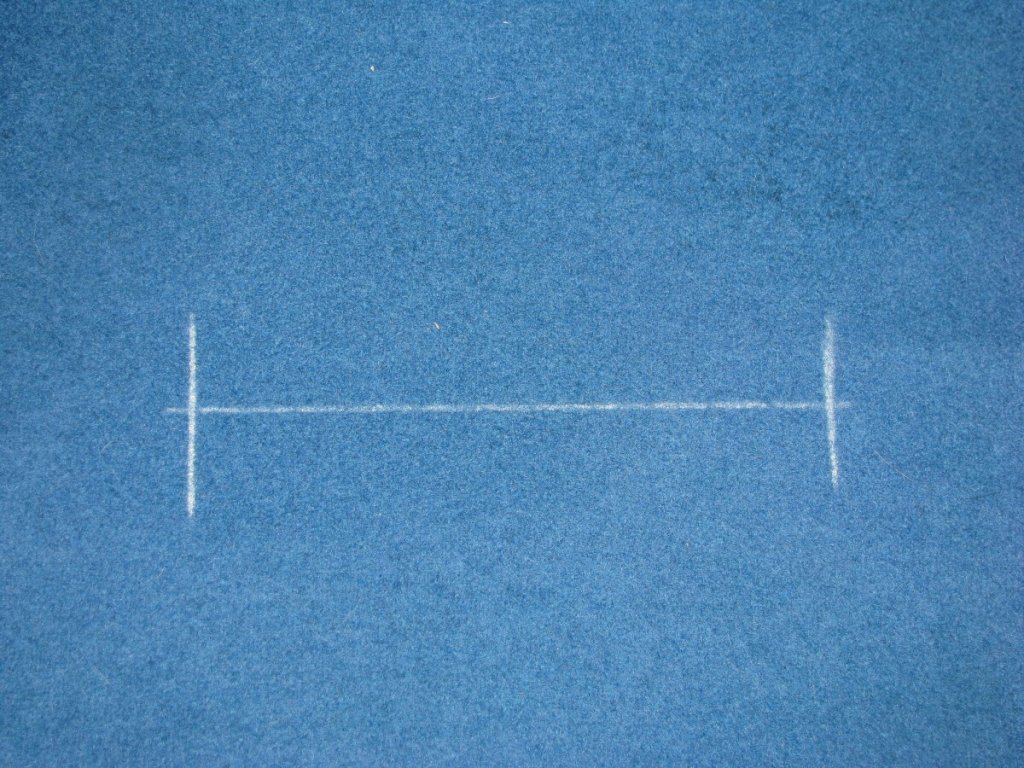
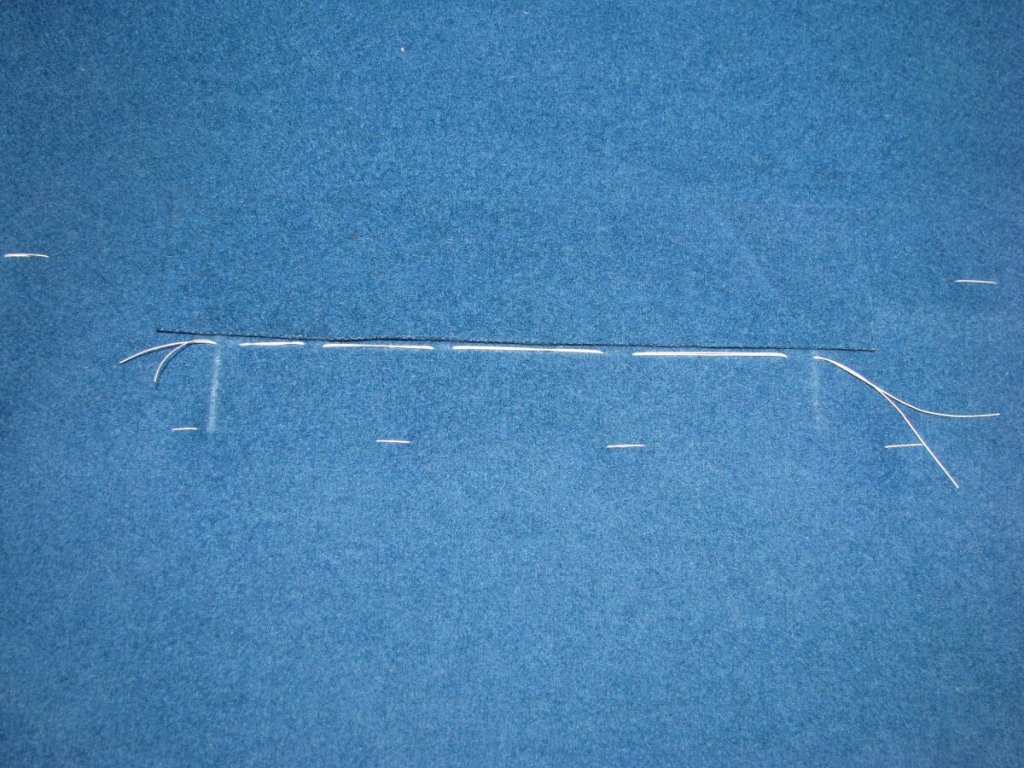
Lay out the pocket with chalk.
Mark the horizontal line first with tailor’s chalk, and then mark the exact lengths. I made mine 5 inches which would be appropriate for something like a vest, but if you expect to get your hand inside, 7 to 8 inches is more appropriate.
Mark the pocket width.
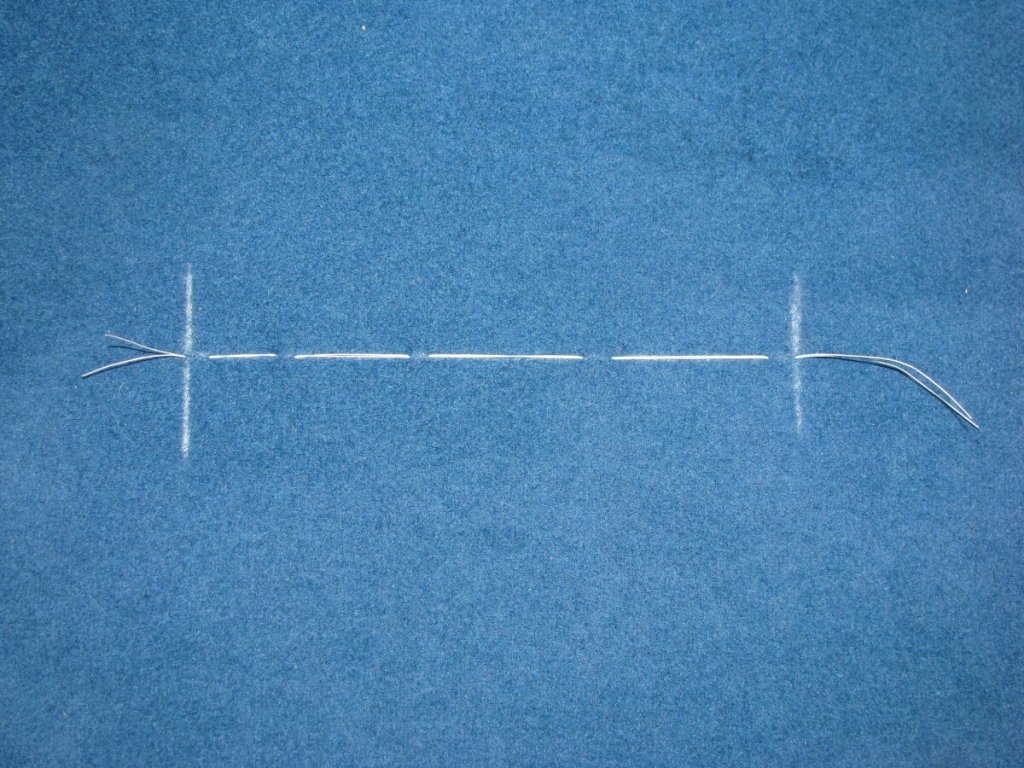
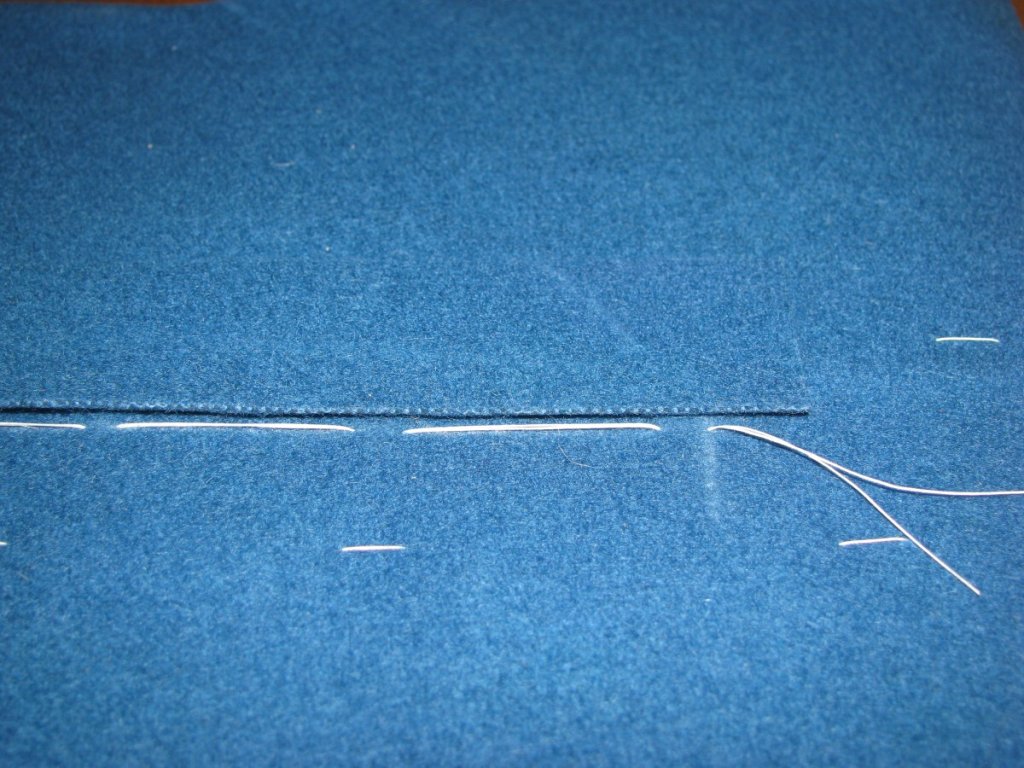
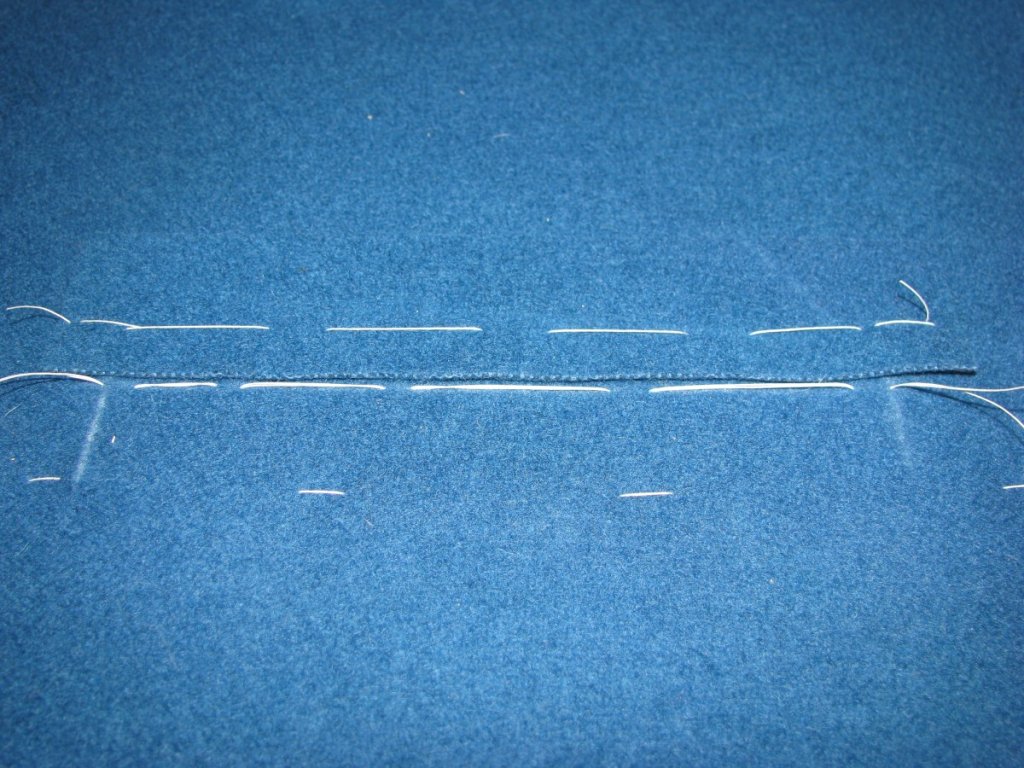
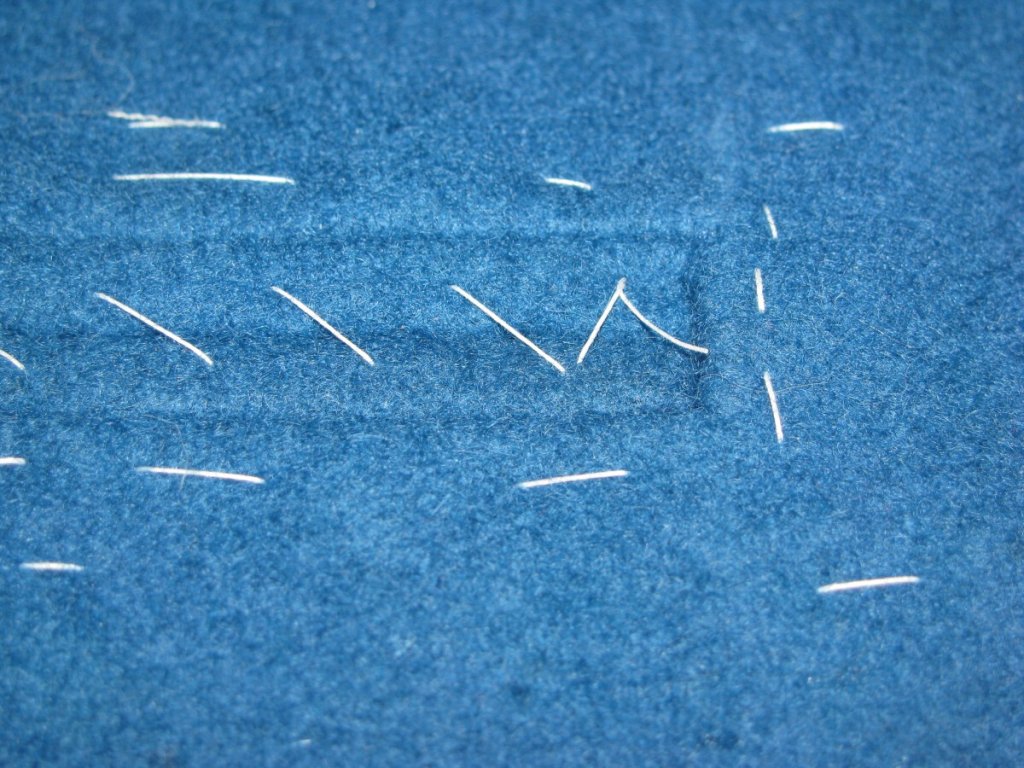
Now using a double strand of basting thread, baste some tailor’s tacks along the horizontal line, to more permanently mark the pocket and to transfer the line to the wrong side. It’s not necessary to cut the tailor tacks open.
Tack the pocket with thread to transfer the lines to the wrong side.
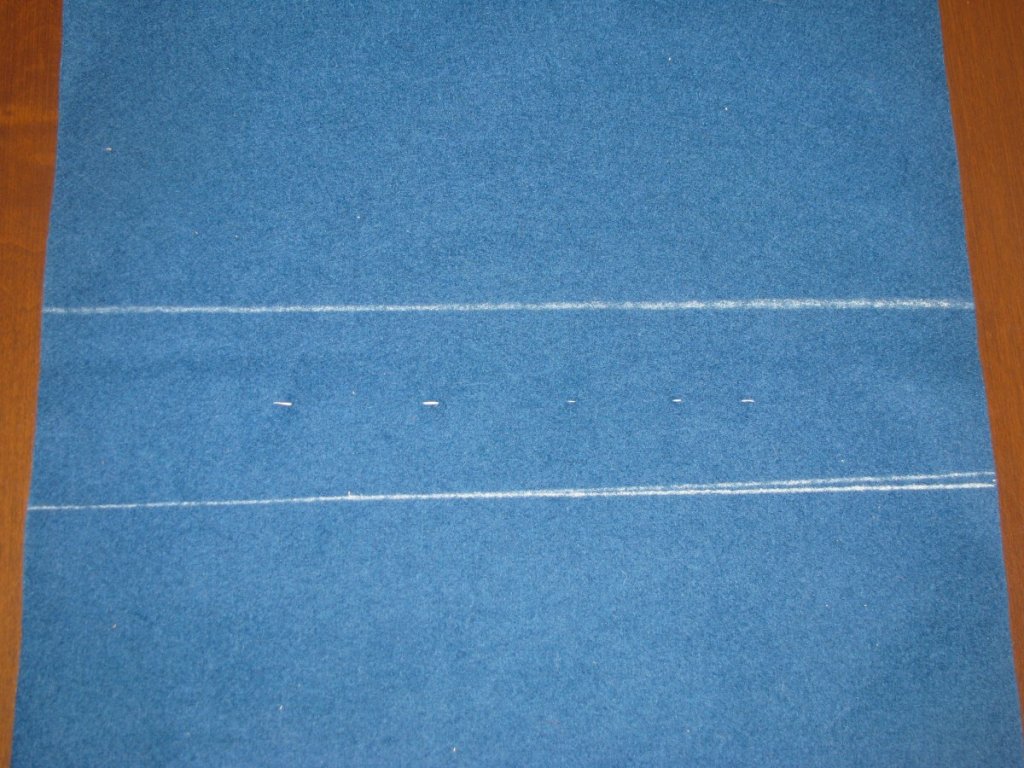
Turn to the wrong side, and draw two parallel lines, one inch below and above the pocket. This will help us to line up our linen stay.
Mark lines above and below the pocket.
Cut a strip of linen 2 inches wide, by a couple of inches longer than the fabric you’re working on. Usually these extend from the center front of a coat to the waist seam, for example. Place it over the pocket, using the two lines as a guide, and baste around the edge of the linen. These basting stitches remain in place until the coat or vest is complete.
Turning over to the right side, you can trim off the excess linen if desired.
Trim the linen flush with the wool.
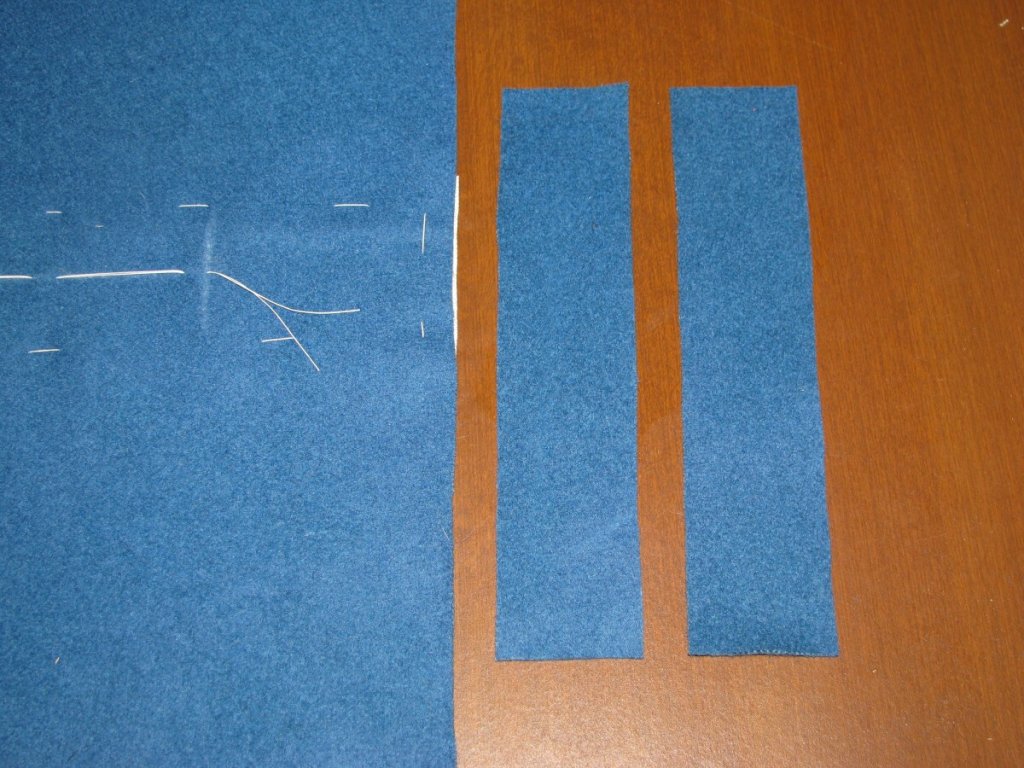
Now cut two jettings out of the fashion fabric, 1 inch longer than the final dimensions of the pocket, and at least 1.5 to 2 inches in width.
Cut the jettings.
Place this along the top or bottom of the pocket, at a distance from the line equal to that of the width of the fabric. There should be 1/2 inch of fabric on each side of the pocket.
Basted this piece down along the length, about 3/8″ from the edge (or slightly more than your desired seam allowance).
Baste down the upper facing.
Repeat the process with the other jetting piece. Notice the distance between the two jettings to accommodate the width of the fabric. This will of course vary depending on which fabric you are using.
Baste the lower jetting in place.
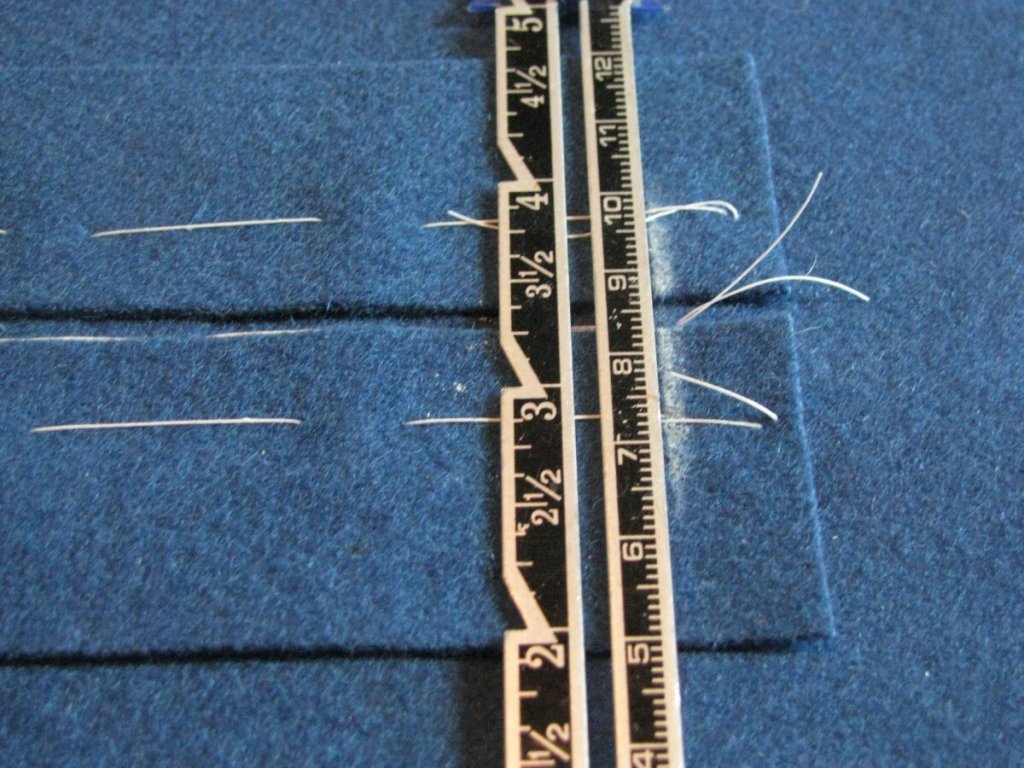
Re-mark the ends of the pockets onto the jettings. Place your ruler on the inside of the pocket so that the sharp side of the chalkline is towards the inside as well, to help you with accuracy.
Remark the ends of the pocket.
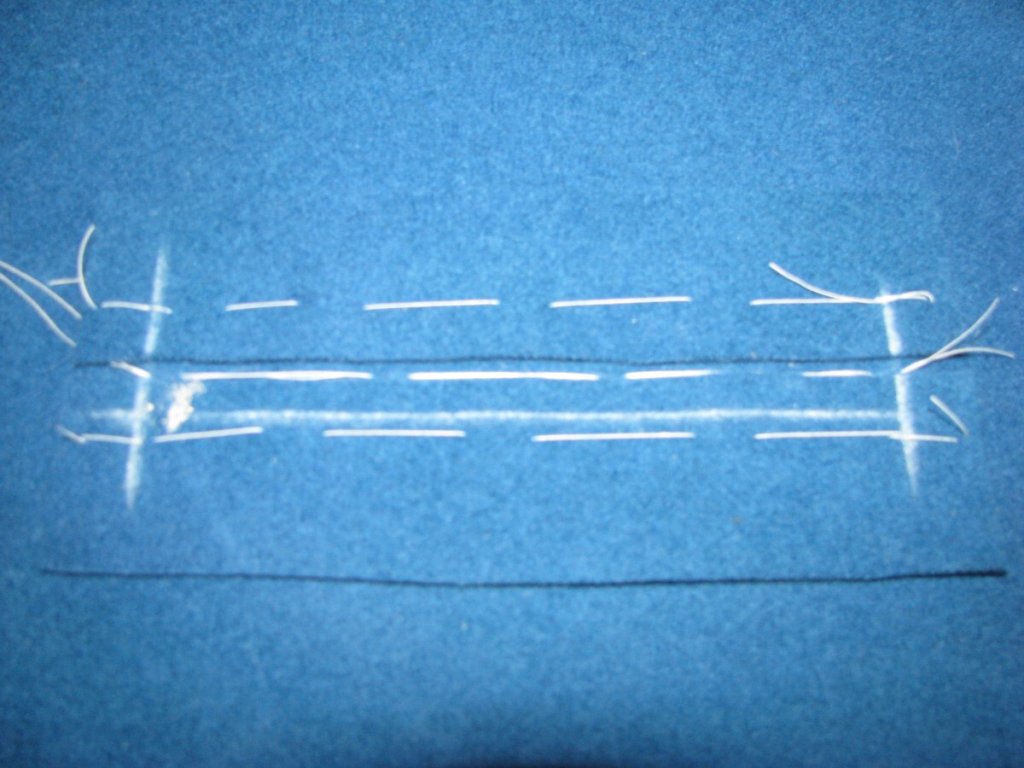
Sorry about the blurry photo. If you wish, you can draw the seam line onto the jettings, 1/4 inch from the edge.
Draw in the seam line if you want.
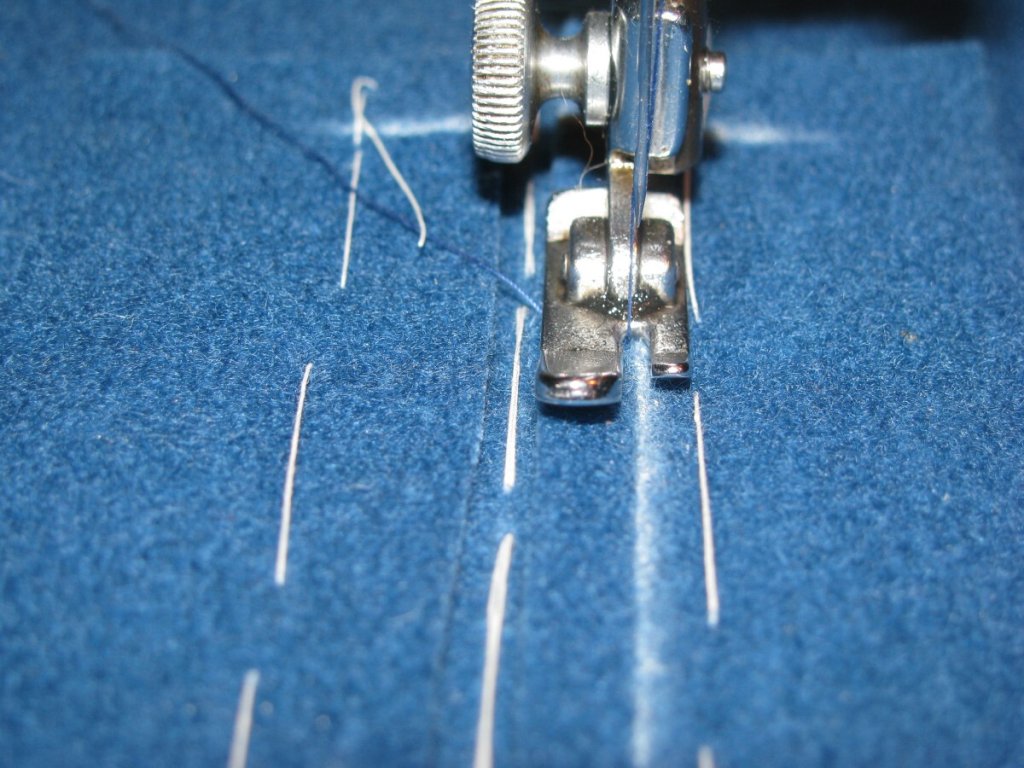
Another trick is to use the width of the presser foot as a guide, lining it up with the edge of the jetting. This assumes that your presser foot is the same width that you want the jettings to be.
Or use the presser foot as a guide.
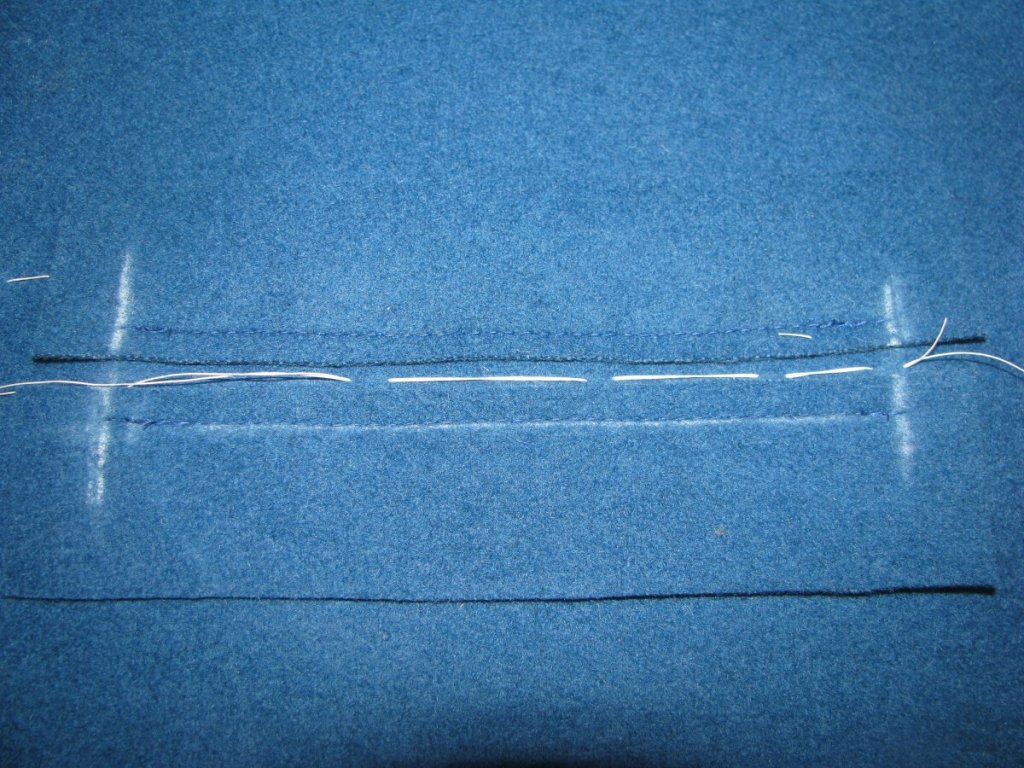
Sew along this line from one end of the pocket jetting to the other, and repeat for the opposite side. Note that you’re not making a ‘box’ out of the stitching, as some modern homesewing guides will tell you to do. The tailored method gives a softer appearance, and when completed is just as strong, if not more so. It’s during construction that things can be delicate, hence the extra skill needed and why it’s dumbed down so often.
Be careful as you get to the ends - as you can see in the photo below, the pieces can sometimes get out of alignment while sewing.
Sew the pocket jettings.
To fix this, redraw the end lines, based off of the marking on the fabric below. Then you can finish the ends of the seam by hand, using the extra length of thread remaining from the machine, or simply use the machine to finish it off.
Ensure the ends of the stitching are aligned.
A good way to check your accuracy is from the wrong side, where the linen shows the stitching more clearly. Here I’m only slightly off.
Check your accuracy from the wrong side.
Here is the back after the corrections have been made. It’s so important that these line up perfectly.
The pocket after correcting the stitching ends.
Remove the basting stitches from the pocket jettings. Leave the tacking stitches marking the pocket itself, they help when cutting open the pocket.
Remove the basting stitches.
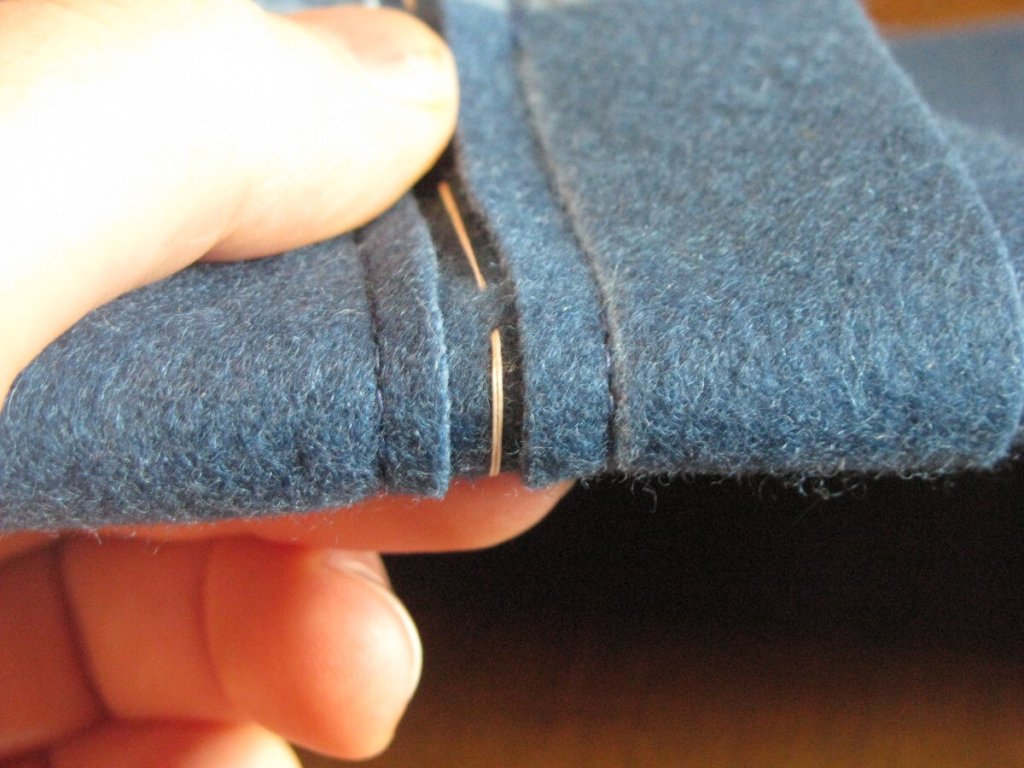
Fold the pocket carefully in half lengthwise, making sure that everything is aligned on both top and bottom.
Fold the pocket in half, aligning the layers.
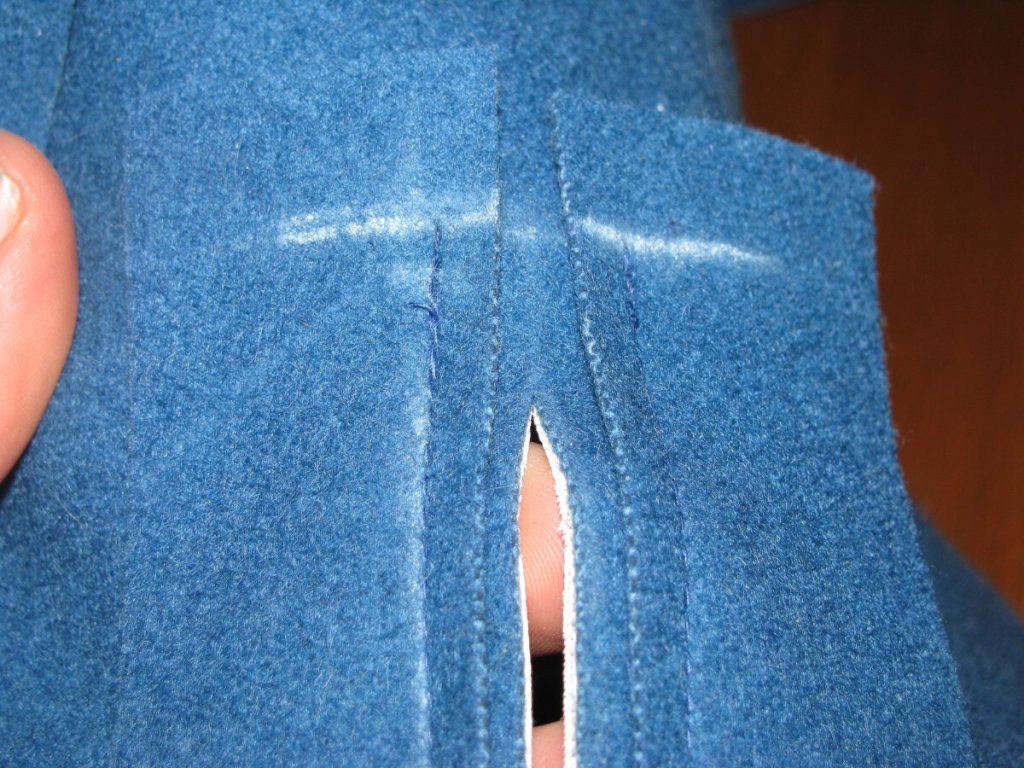
Making sure the scissors are parallel to the pocket, make a small cut about 1/4″ in depth on the folded edge of the pocket. This can be very stressful at first, especially if you’ve put a lot of work into a garment, but with practice it becomes second nature.
Make a small cut in the center of the pocket.
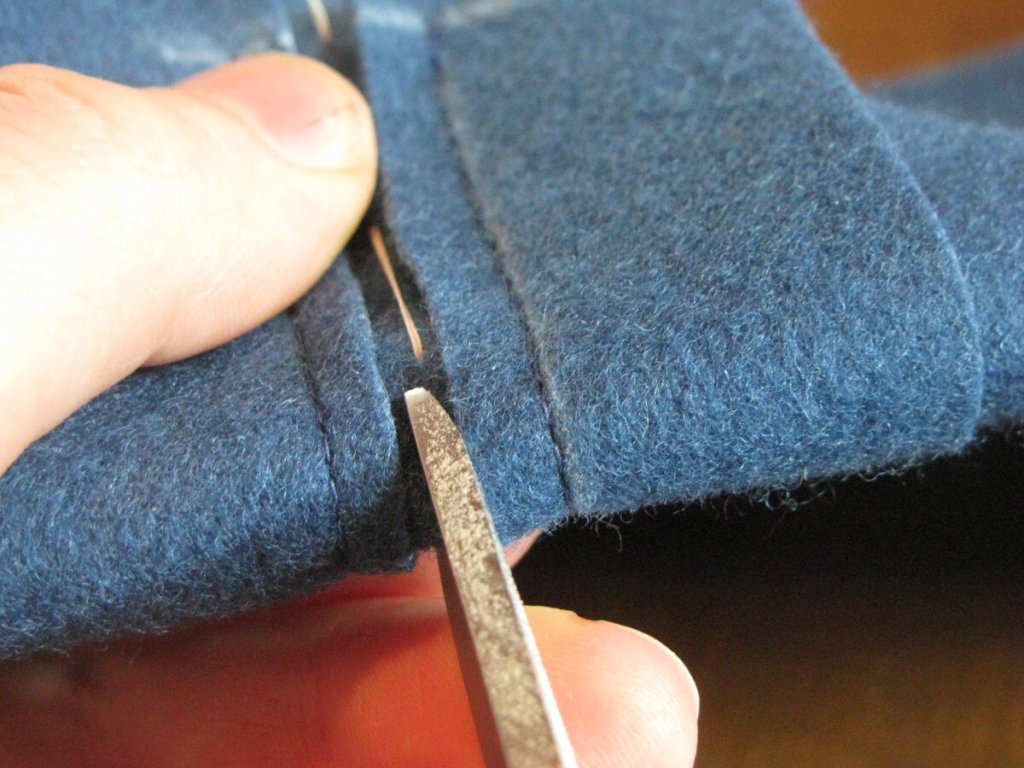
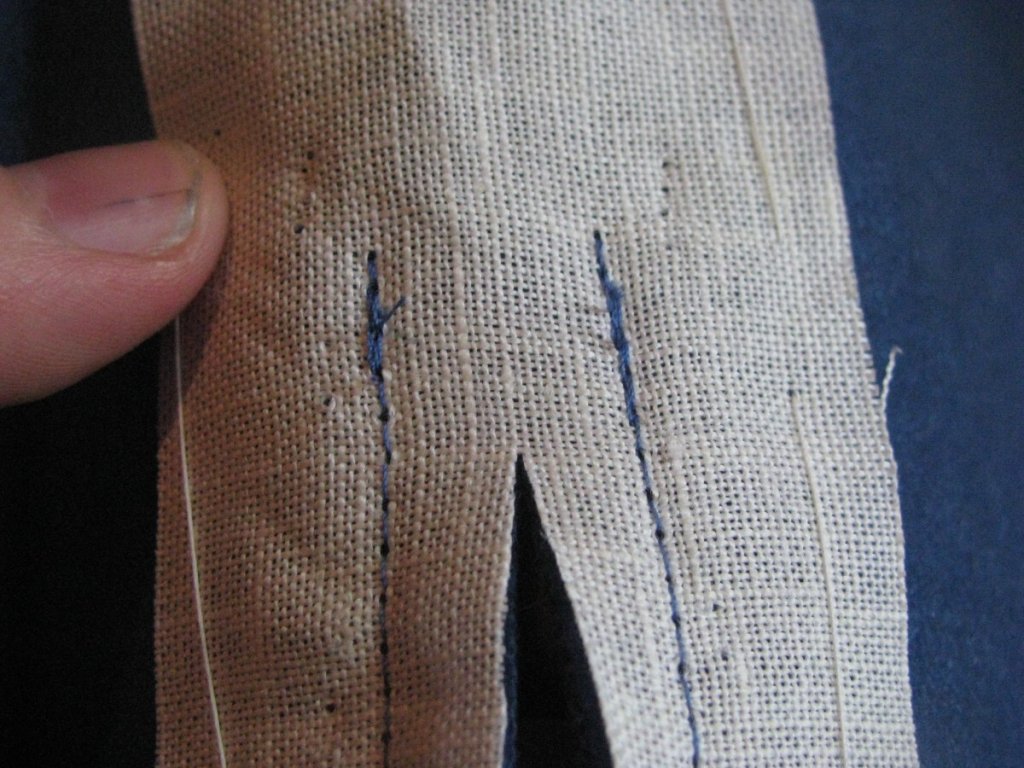
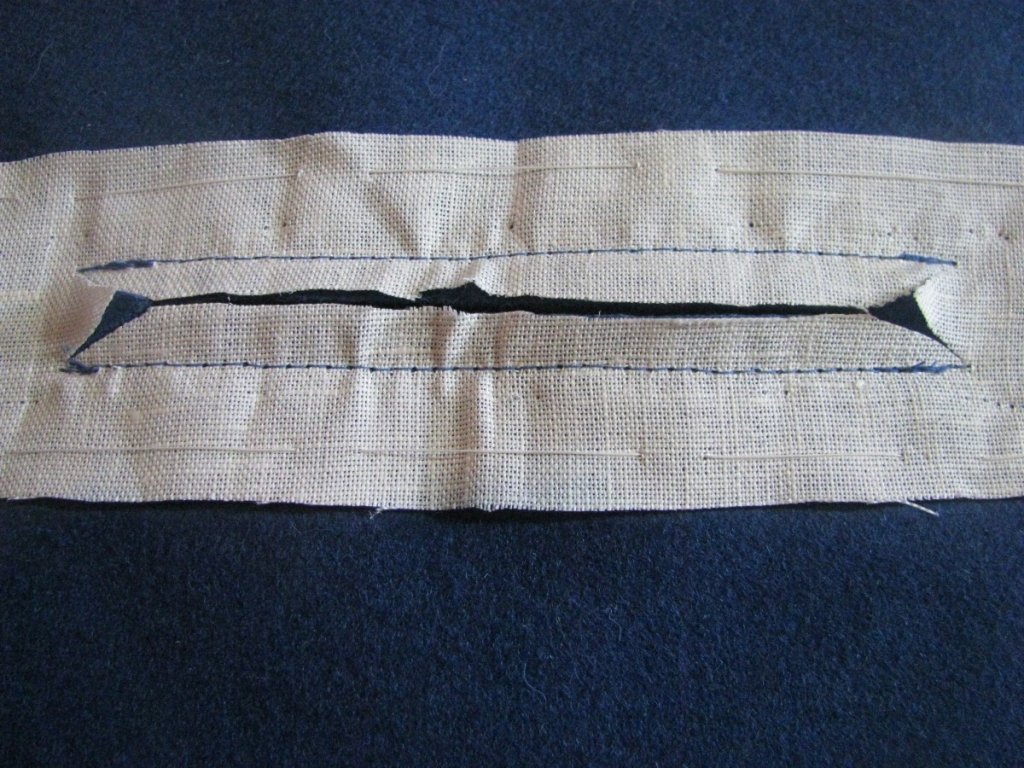
Unfold the pocket and insert your scissors into the opening you just cut. Continue cutting along the pocket line that you marked in the beginning, stopping 1/2″ from either end.
Continue cutting the pocket open, stopping 1/2" from either end.
The cut line stops 1/2″ from the end.
The cut line stops 1/2″ from the end.
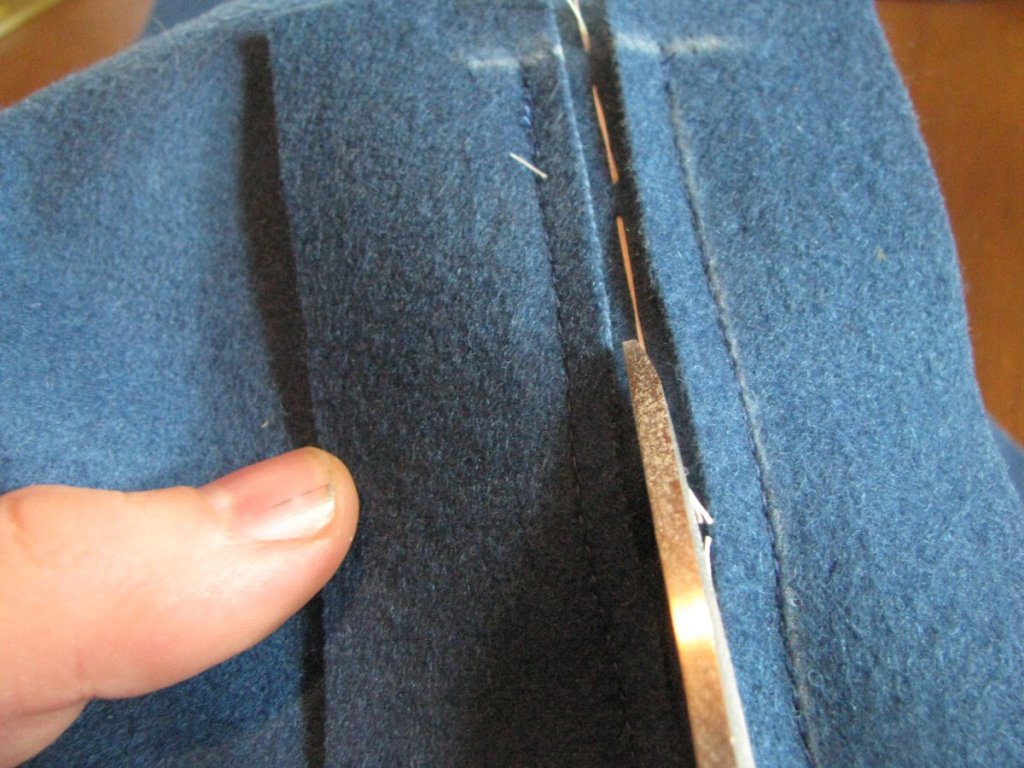
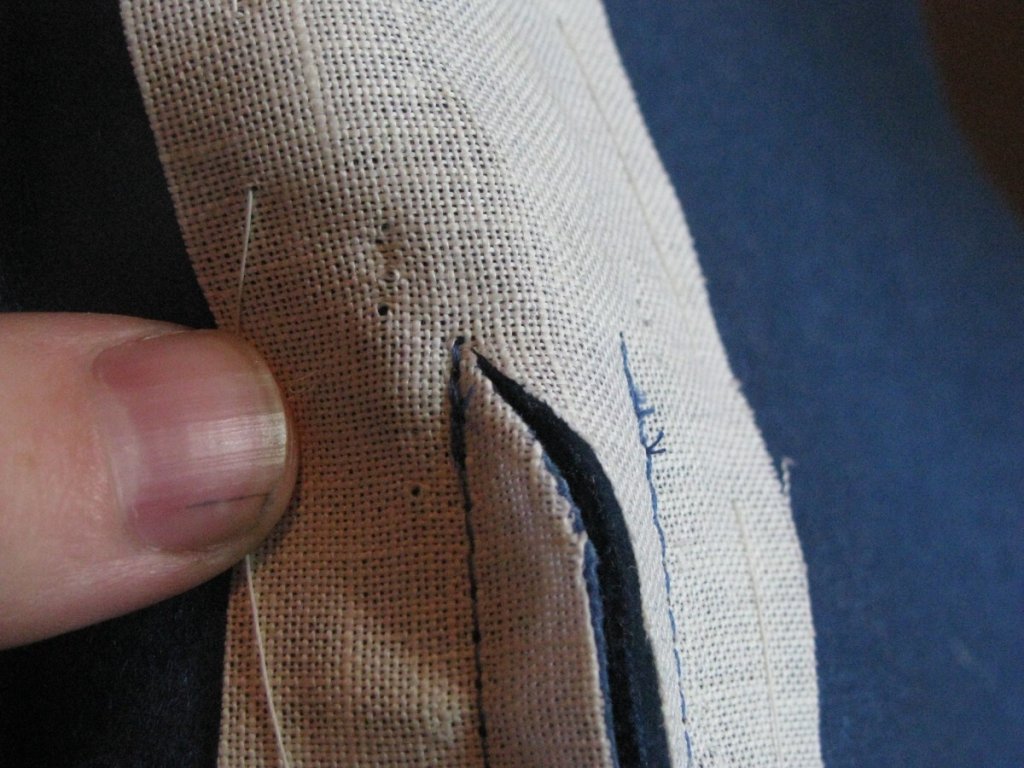
Turn the pocket to the wrong side for this next step.
Turn the pocket to the wrong side for this next step.
These next four cuts are the most critical step in the pocket. If you cut too far, you’ll end up with holes in the corners of your pocket. If you do not cut far enough, your pockets will be plagued with puckers and folds at the corners.
The idea is to cut from the point you left off at, 1/2″ from the end of the pocket, at an angle to precisely the end of that particular row of stitching. You can see in this photo that I was one thread off.
Cut diagonally to the ends of each stitch line.
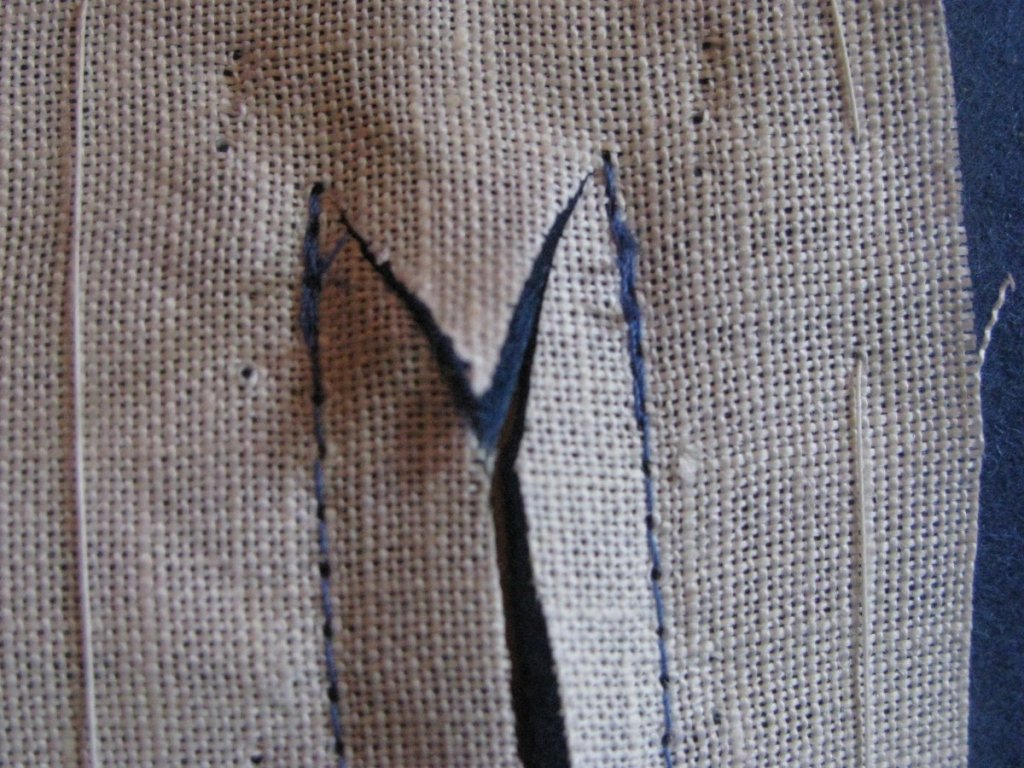
Repeat along the other edge, forming a ‘v’ with the cut lines. This will be folded back later on.
Repeat along the other edge, forming a ‘v’ with the cut lines.
And repeat again for the other end of the pocket. Here is the final result.
Repeat for the other end.
The stressful and difficult part is out of the way! As long as you’re careful while handling the pockets in this next stage, you should be fine.
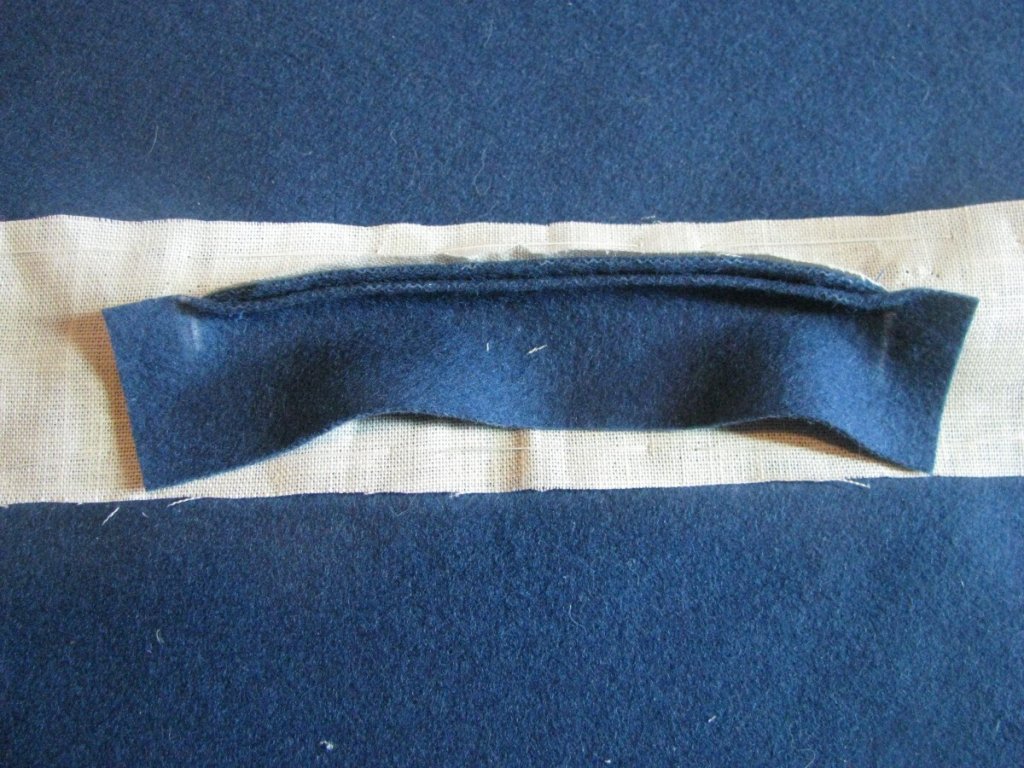
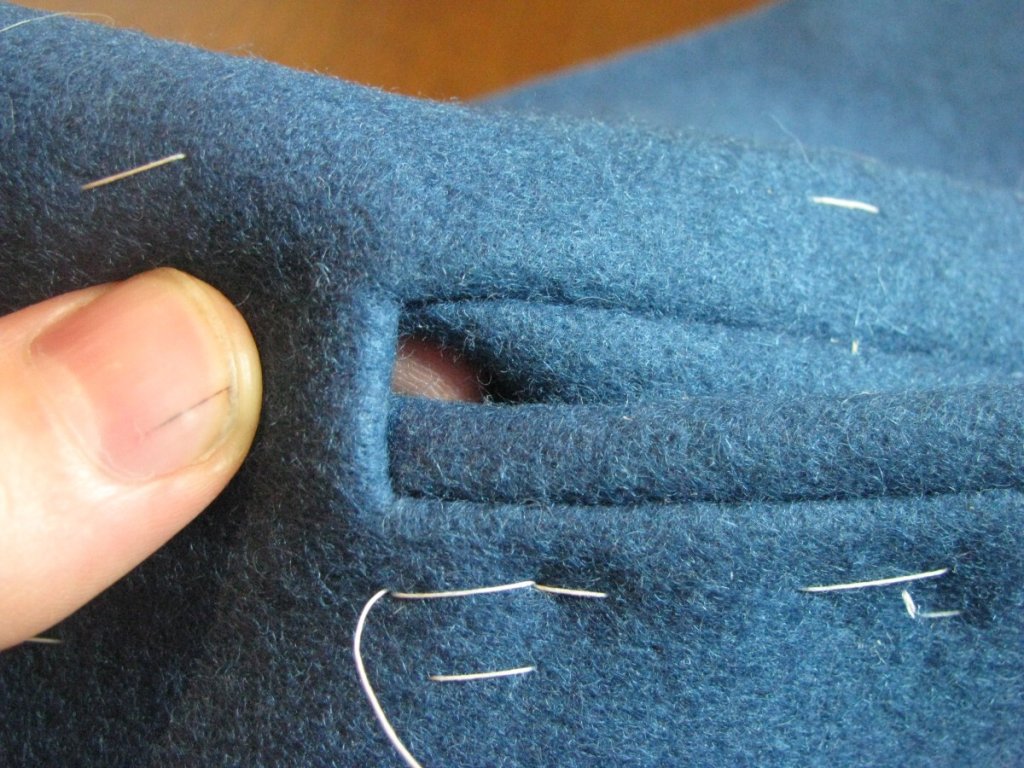
Pull one of the jettings through the opening to the wrong side of the fabric. Be on the lookout for puckers, as this is your chance to fix them.
Pull one of the jettings to the wrong side.
Using some steam, press open the seam on the first jetting.
Press the seam open firmly.
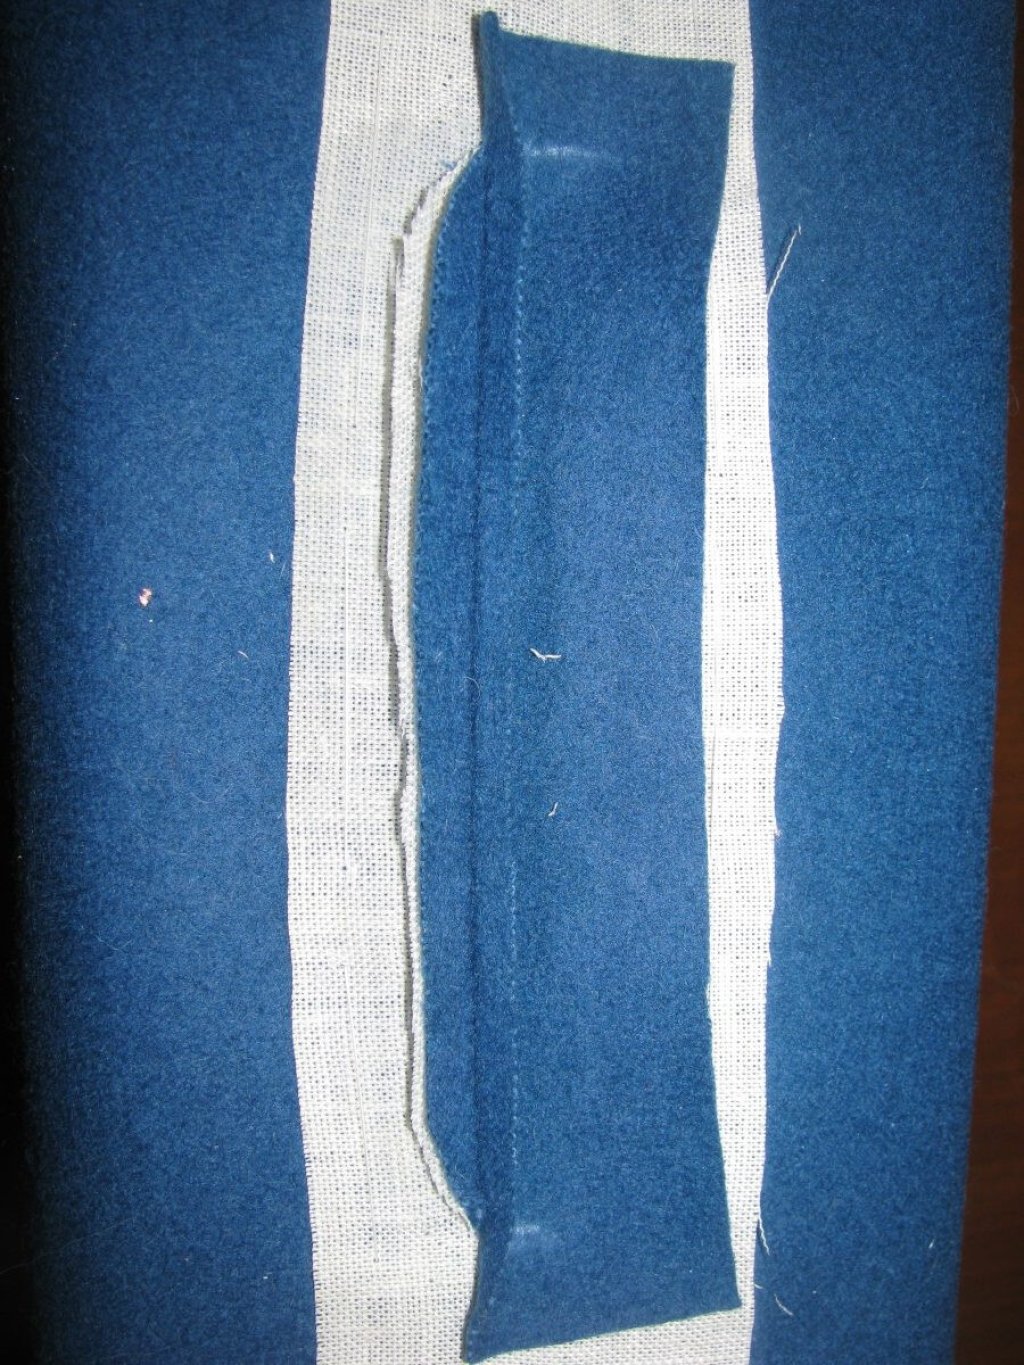
Pass the jetting back through to the right side, and press the seam from the right side, making sure to use a press cloth, or you’ll leave iron marks. Repeat for the other jetting.
Press the seam from the right side.
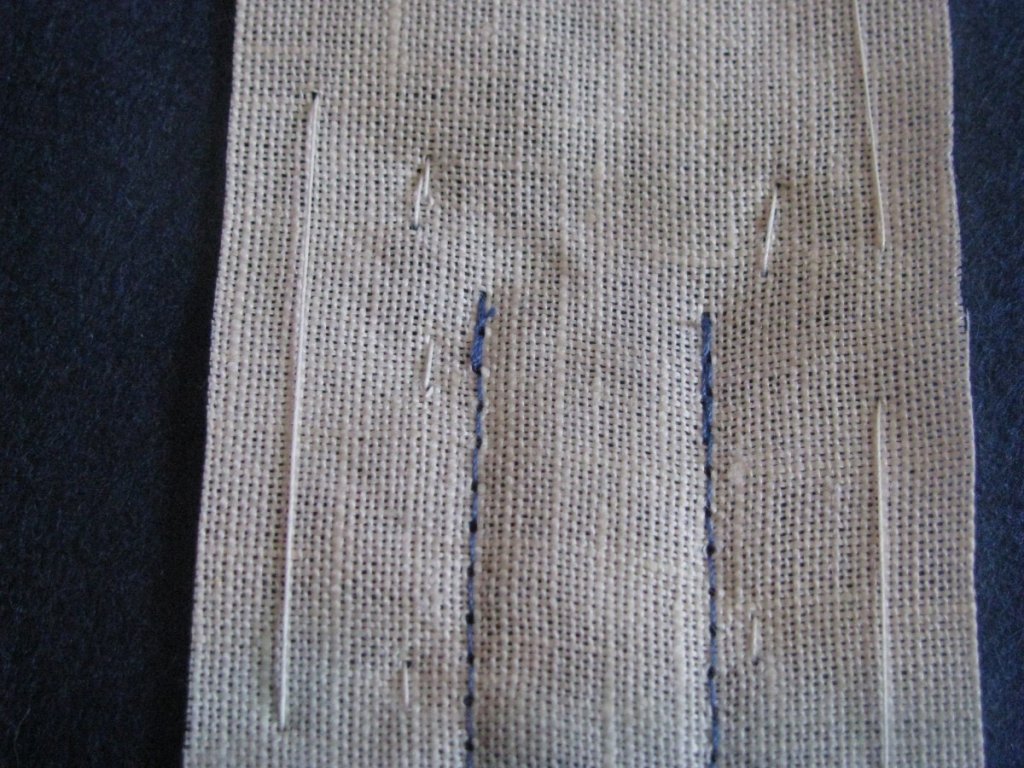
Starting at the middle of one of the jettings, fold the fabric down and to the wrong side, making sure the seam allowance is contained in this section, for strength. Begin basting at the center, and slowly work your way to one of the ends.
Begin basting the facings over to the wrong side.
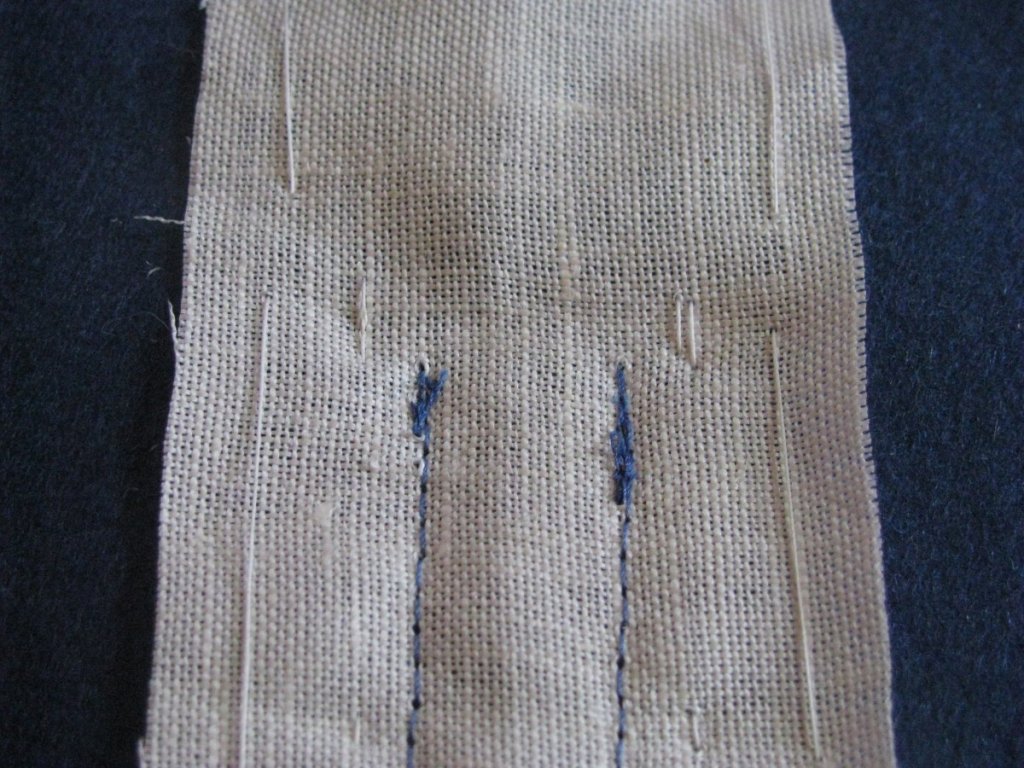
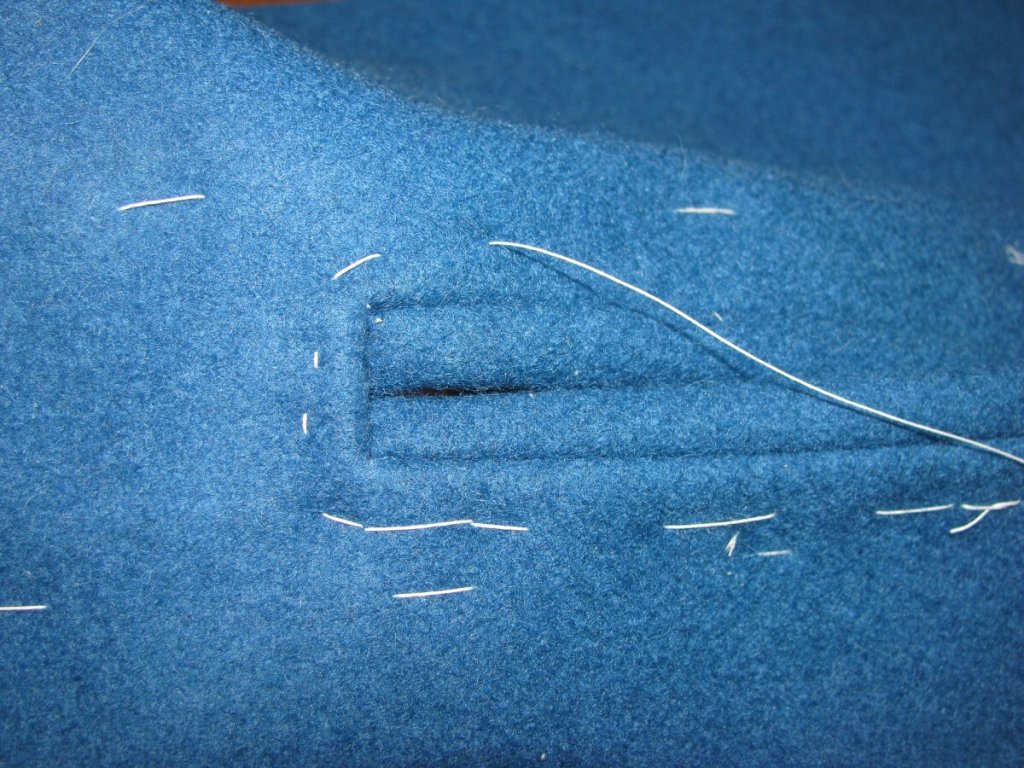
Continue folding over the jetting and pass the end through to the wrong side. At the same time, fold back the triangle of fabric, ensuring that a nice crisp 90 degree angle is formed at the corner.
Form right angles at the ends.
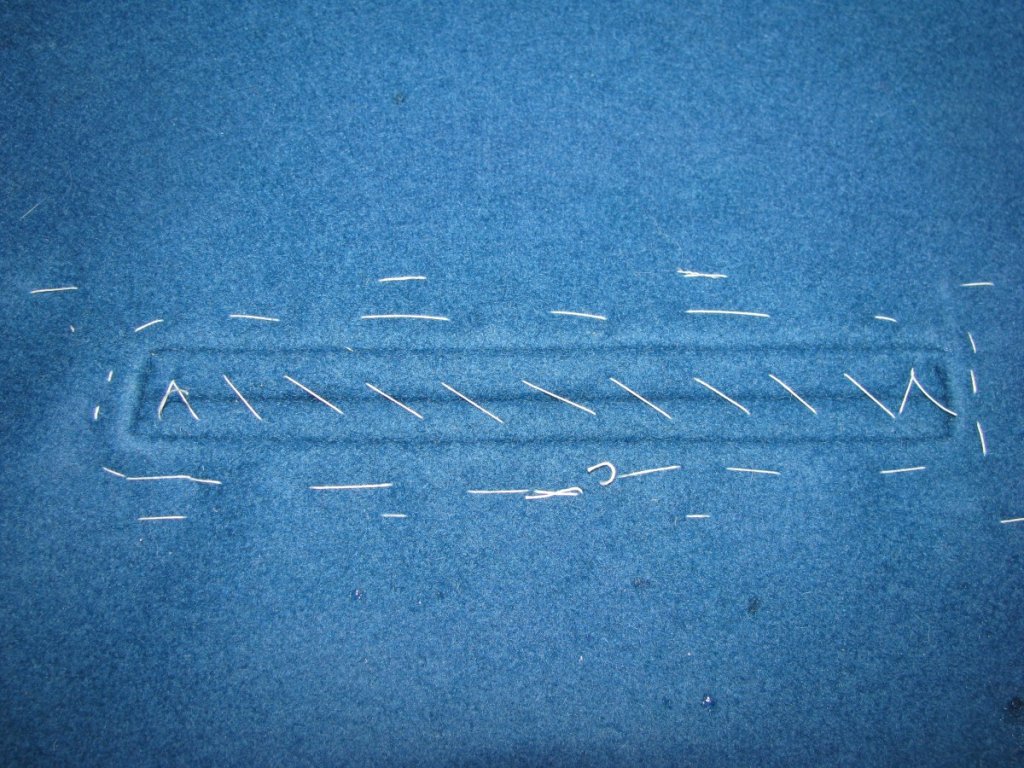
Baste along the end of the pocket, using a backstitch or two for extra security on the triangular section, and continue the process along the other jetting, opposite end, and back to where you started.
Baste along the end of the pocket and across the remaining edge.
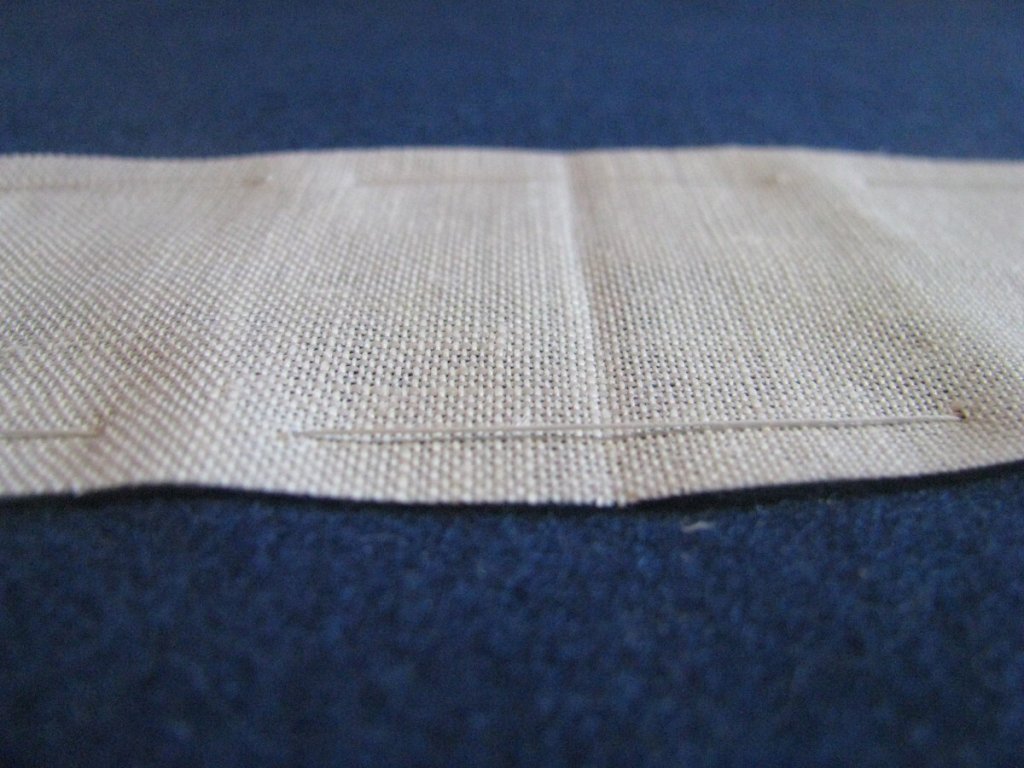
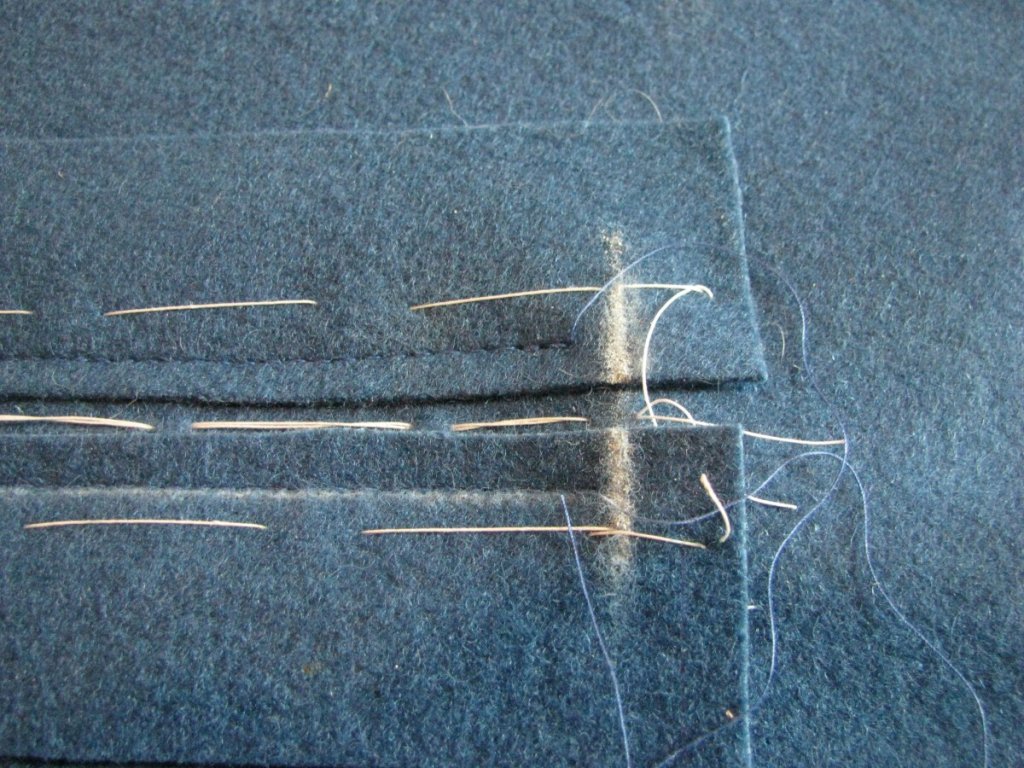
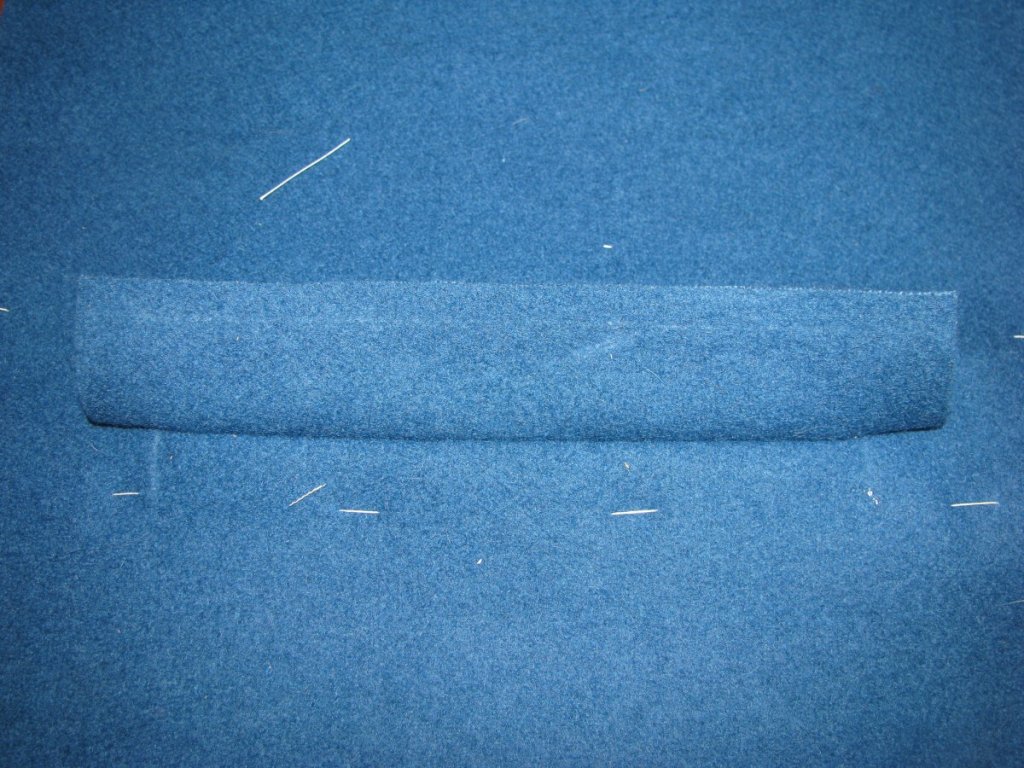
Baste the pocket closed with some diagonal stitches. In my example there seems to be a slight issue at the upper right hand corner, and the top jetting is slightly wider than the bottom.
Baste the pocket closed along the opening.
Here’s one end of the pocket in better detail. Normally, the pocket bags would be attached now, and the ends secured further, but we’ll leave that for the next lesson. For now, concentrate on learning to make these jettings and getting your mind around how they work. I know it used to confuse me to know end when I first started! But with a bit of practice, nearly anyone can make professional looking pockets.